Sending Bulk Invitations
Using the Invite by CSV feature lets you send several invitations at once.
The CSV template for sending bulk invitations contains several columns for entering information regarding employees. In addition to the basics, these fields are used to specify scoring options for completed assessments for each employee.
Job Family
The Job Family is used to automate the development report and determine which job family is used for scoring. Only one job family value can be added.
Values and the job family they represent are as follows:
1 = Front-line Leader
2 = Leader
3 = Charge Nurse
4 = Nurse Supervisor
5 = Supervisor
6 = Technical
7 = Nurse Manager
8 = Manager
9 = Director
10 = Executive
Applicant Type
This column determines if the applicant is Internal (I) or External (E).
Dev Suggestion
The Dev Suggestion column determines which competencies are detailed on the completed assessment report for the candidate.
-
Bottom. Focus on Opportunities (three lowest-ranked competencies)
-
Top. Focus on Strengths (three highest-ranked competencies)
-
Custom. Select individual competencies to show on the Feedback Report.
Competencies
When Custom is used for Dev Suggestion, use this column to enter the specific competencies you want to show on the Feedback Report.
Multiple competencies can be added, separated by using the pipe symbol (|).
-
Select Invite by CSV to open the CSV Import area, including a CSV template download.
-
Click the template link to download a template of the CSV file.
-
Enter your applicant details within the file and save your additions. See the CSV template info area above for information on the columns and values used in the template.
-
Select Choose File to browse to the CSV file to upload.
-
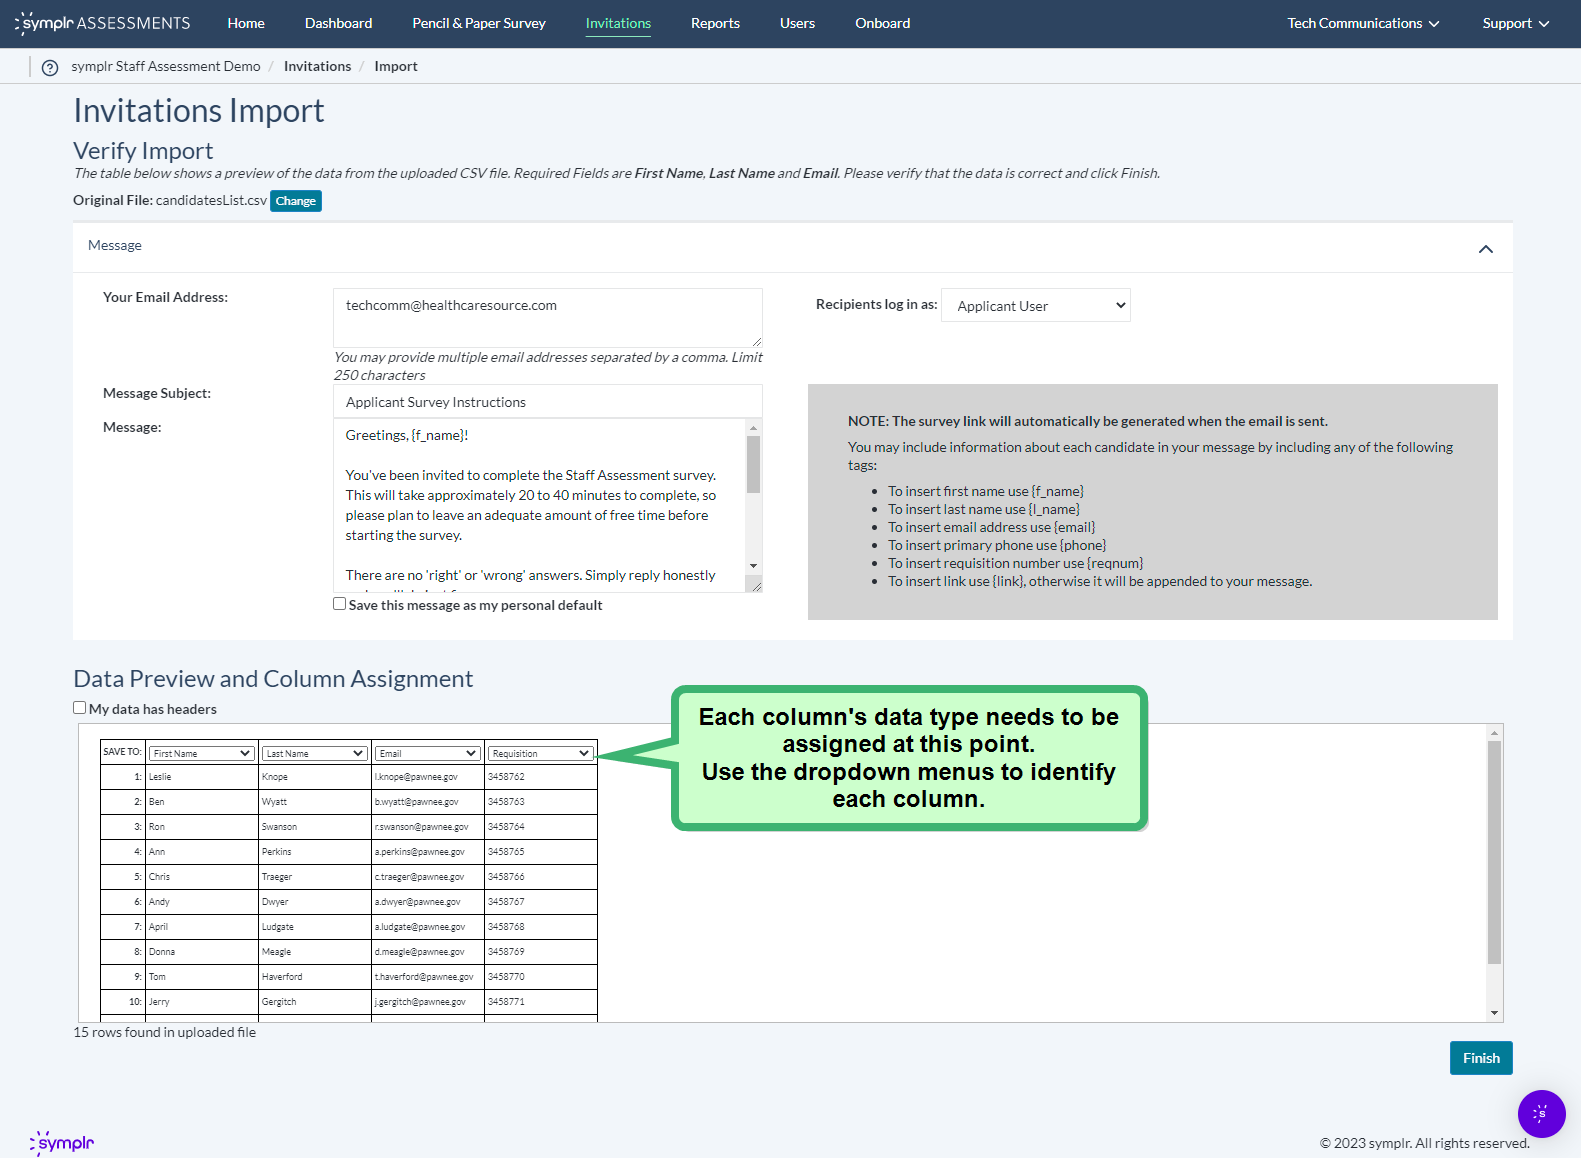
Select Import. This displays the Invitations Import page, which includes the Message section where you can make any changes to your messaging, and the Data Preview and Column Assignment section displaying the data as it was imported from the spreadsheet.
-
In the Message section, make any necessary adjustments to the return email address, alter the subject line, and/or edit the message body.
Note: If you really like what you've entered, selecting the Save this message as my personal default check box makes this content your default message for any future invitations.
-
In the Data Preview and Column Assignment section, map each column to the appropriate categories by using the Save To: drop-down menus along the top row.
-
Selecting Finish completes the CSV import process and displays the imported data as new entries on the Invitations page.

