Schedule Details
Each schedule type in symplr Performance (360 Review, Appraisal, Checklist, and Document) has its own form that define the details of the schedule, such as due dates and frequency. These forms contain many of the same fields, but are not entirely identical.
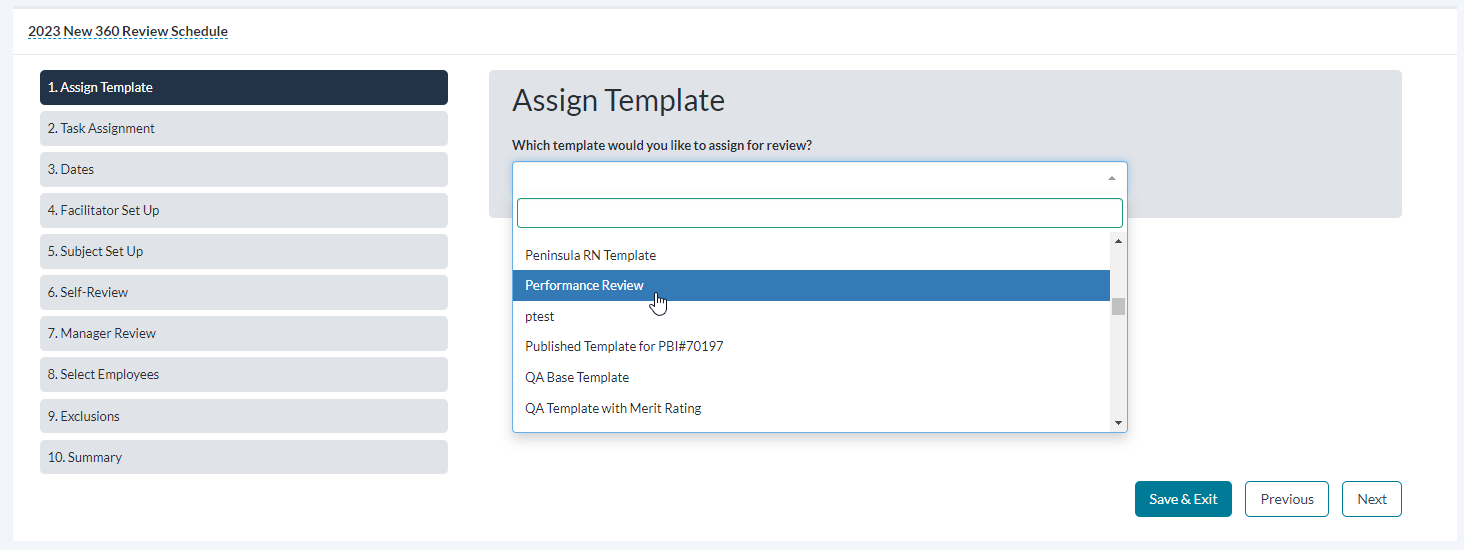
When creating a new 360 Review Schedule, you must complete a 10-step process to enter all the necessary details.
-
Assign Template. Select an existing evaluation template from the drop-down menu. Selecting Next continues to step 2.
-
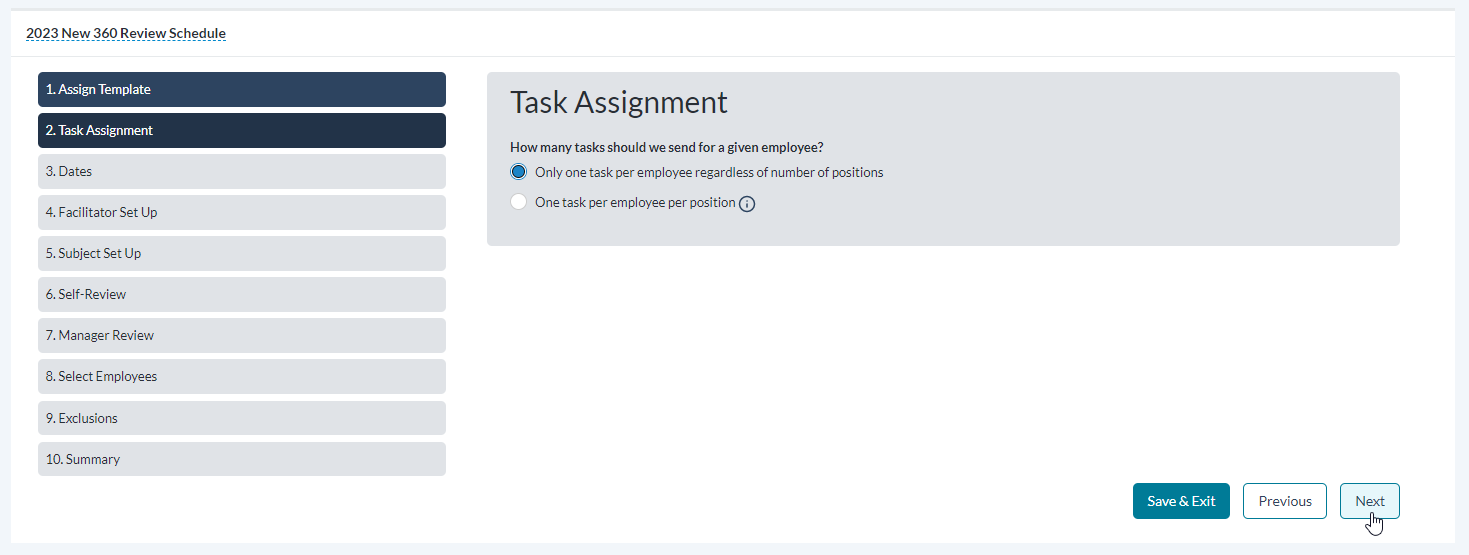
Task Assignment. Your choice here determines whether an employee receives a single review task, or is given a review task for each position they held during the schedule dates. This second option is primarily used if an employee has transferred departments or has obtained an additional position, to review each position held.
-
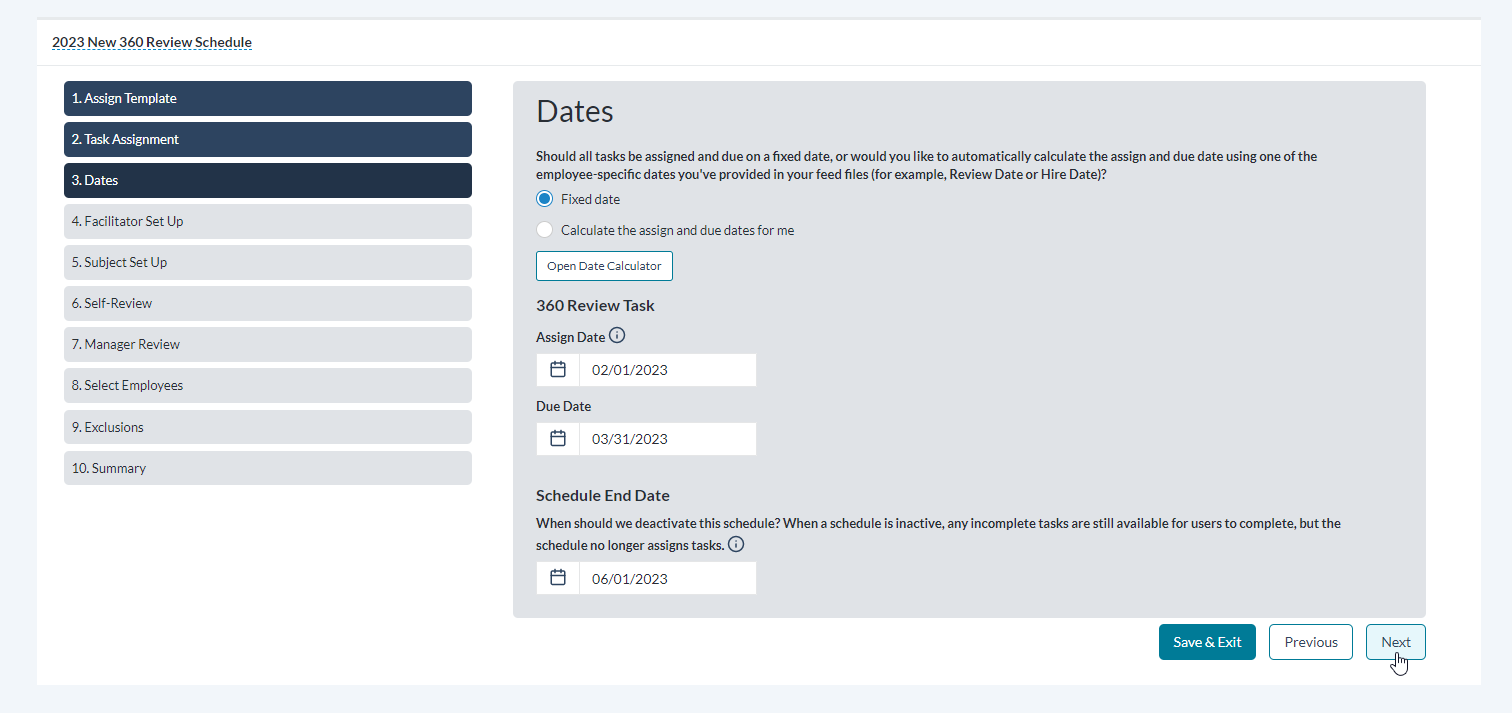
Dates. On this step, all tasks may be assigned and due based on a fixed date you enter, or can be calculated and assigned and due based on one of the employee-specific dates you provide.
-
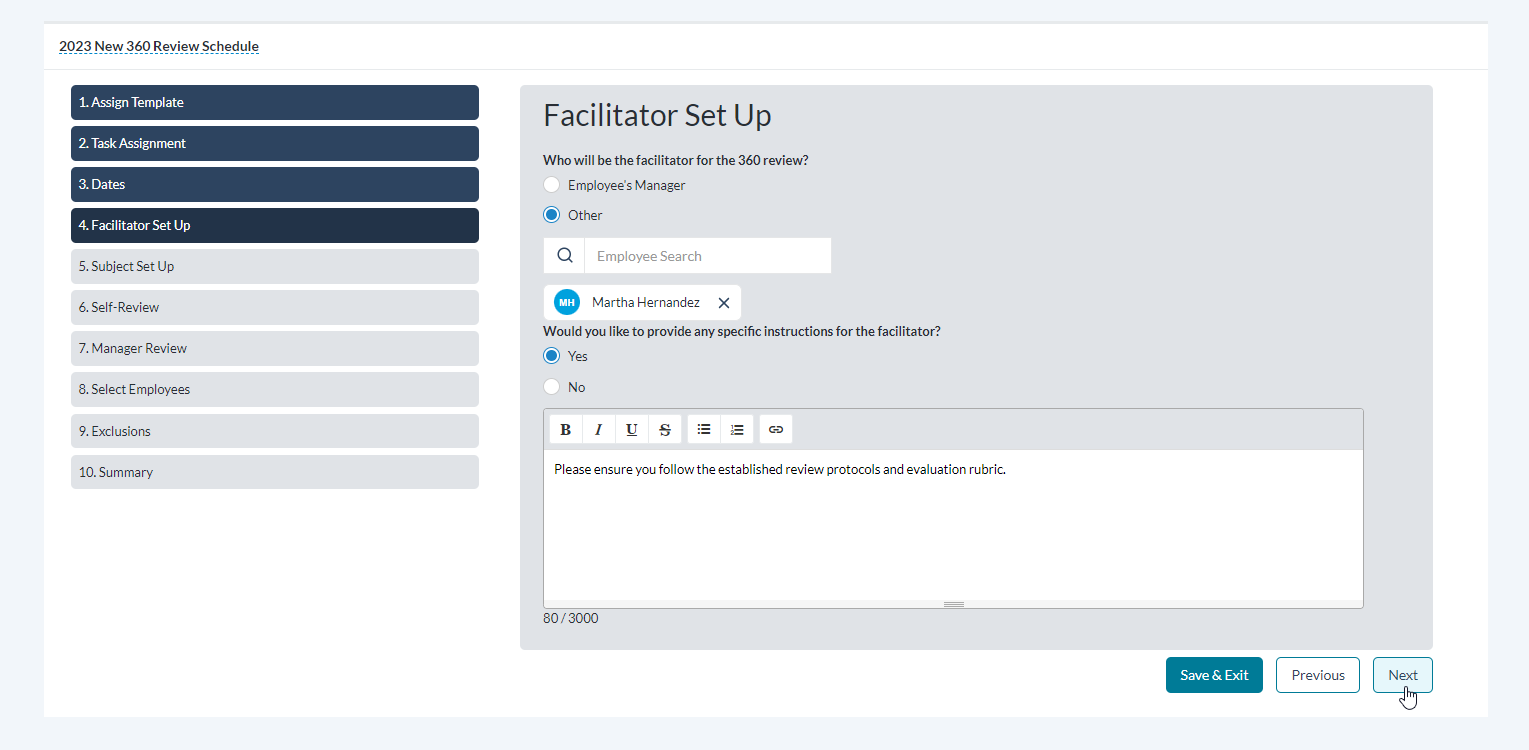
Facilitator Set Up. Determine who will conduct the review. You can select to automatically assign the employee's manager, or specify a particular reviewer using the Employee Search bar. Enter text in the field below if you want to give any additional written instruction to the facilitator.
-
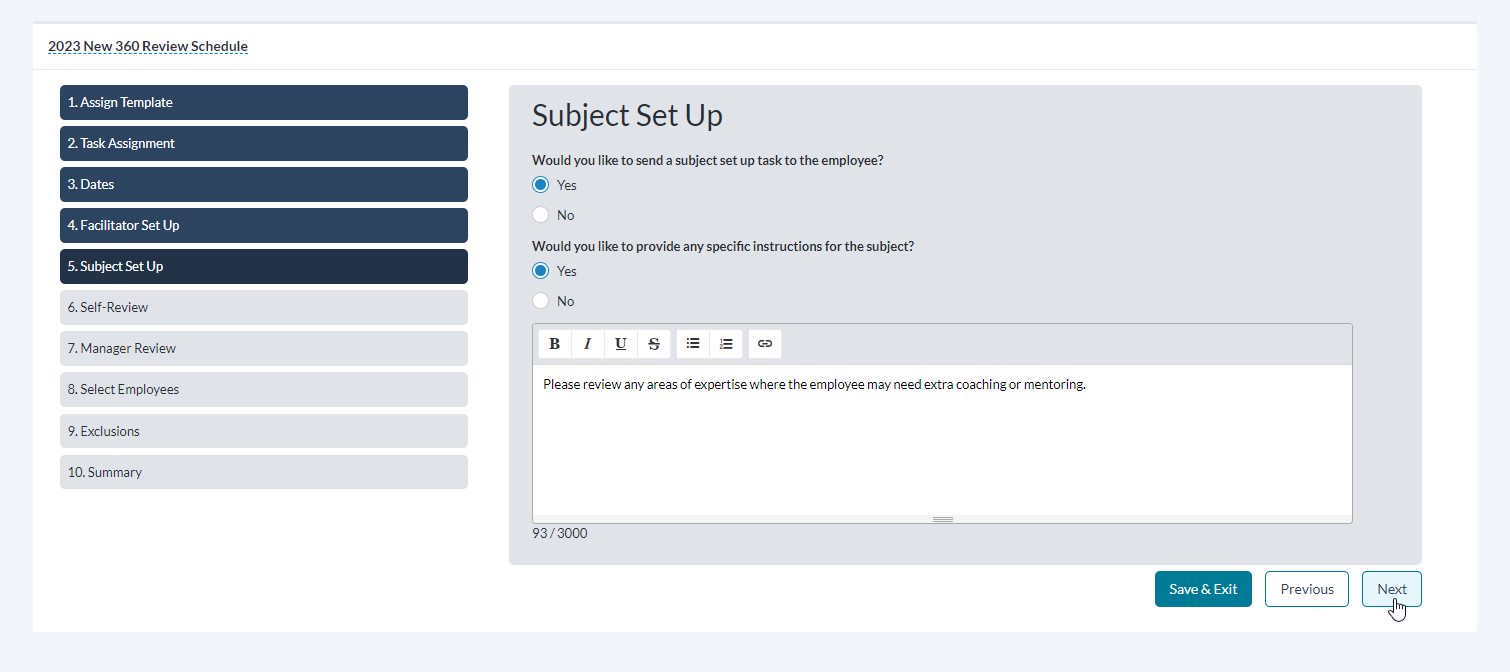
Subject Set Up. Select if you wantto send a subject set-up task to the employee. Enter text in the field below if you want to give any additional written instructions on the subject.
-
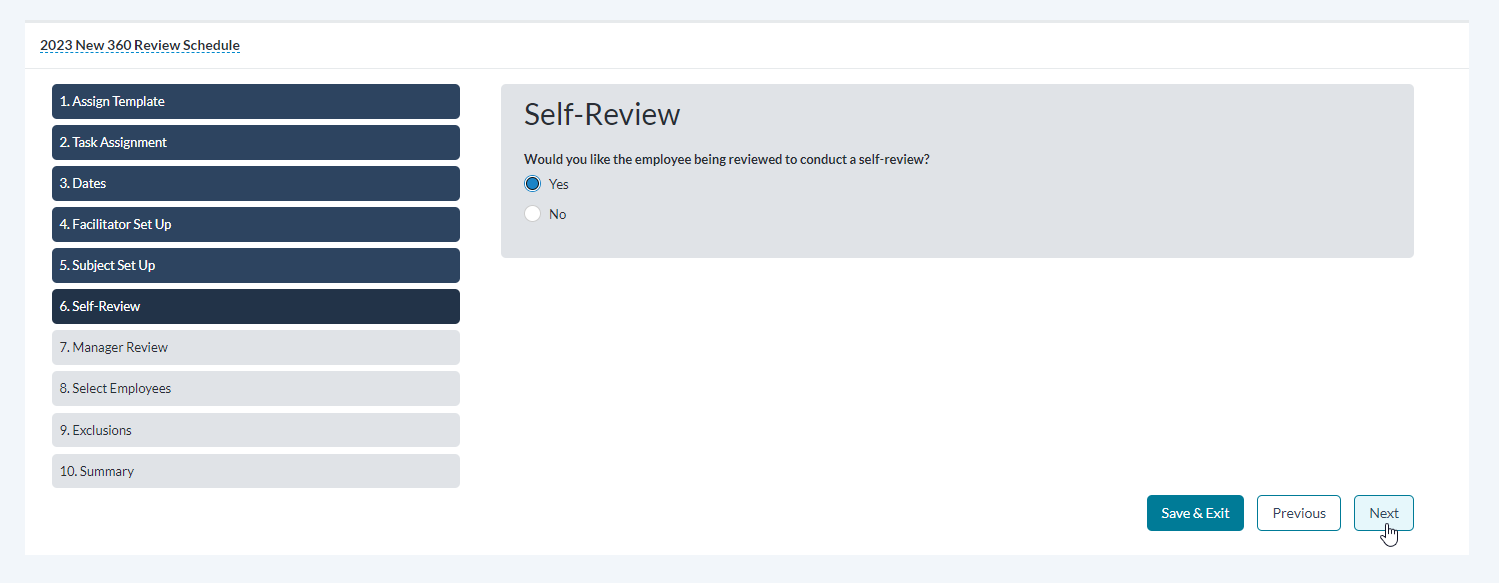
Self-Review. Selecting Yes or No on this step determines whether each employee receives a Self-Review task in addition to their 360 Review task.
-
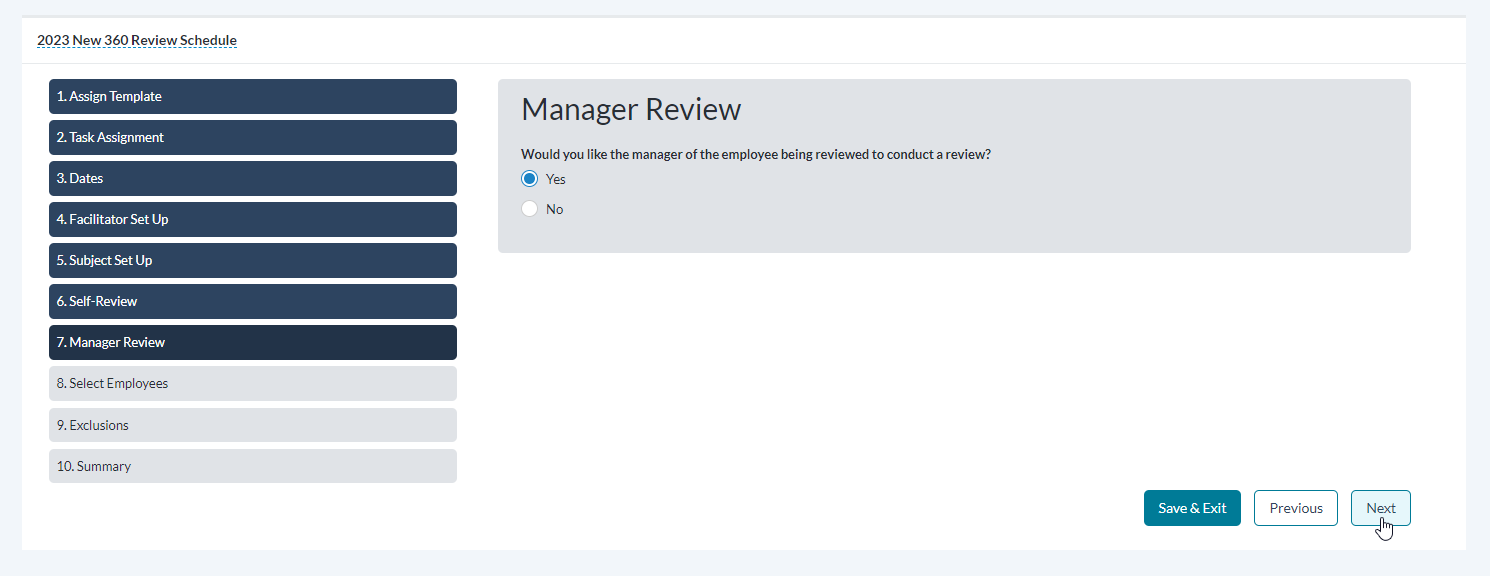
Manager Review. Selecting Yes or No on this step determines whether the employees' manager receives a review task in addition to their 360 Review task.
-
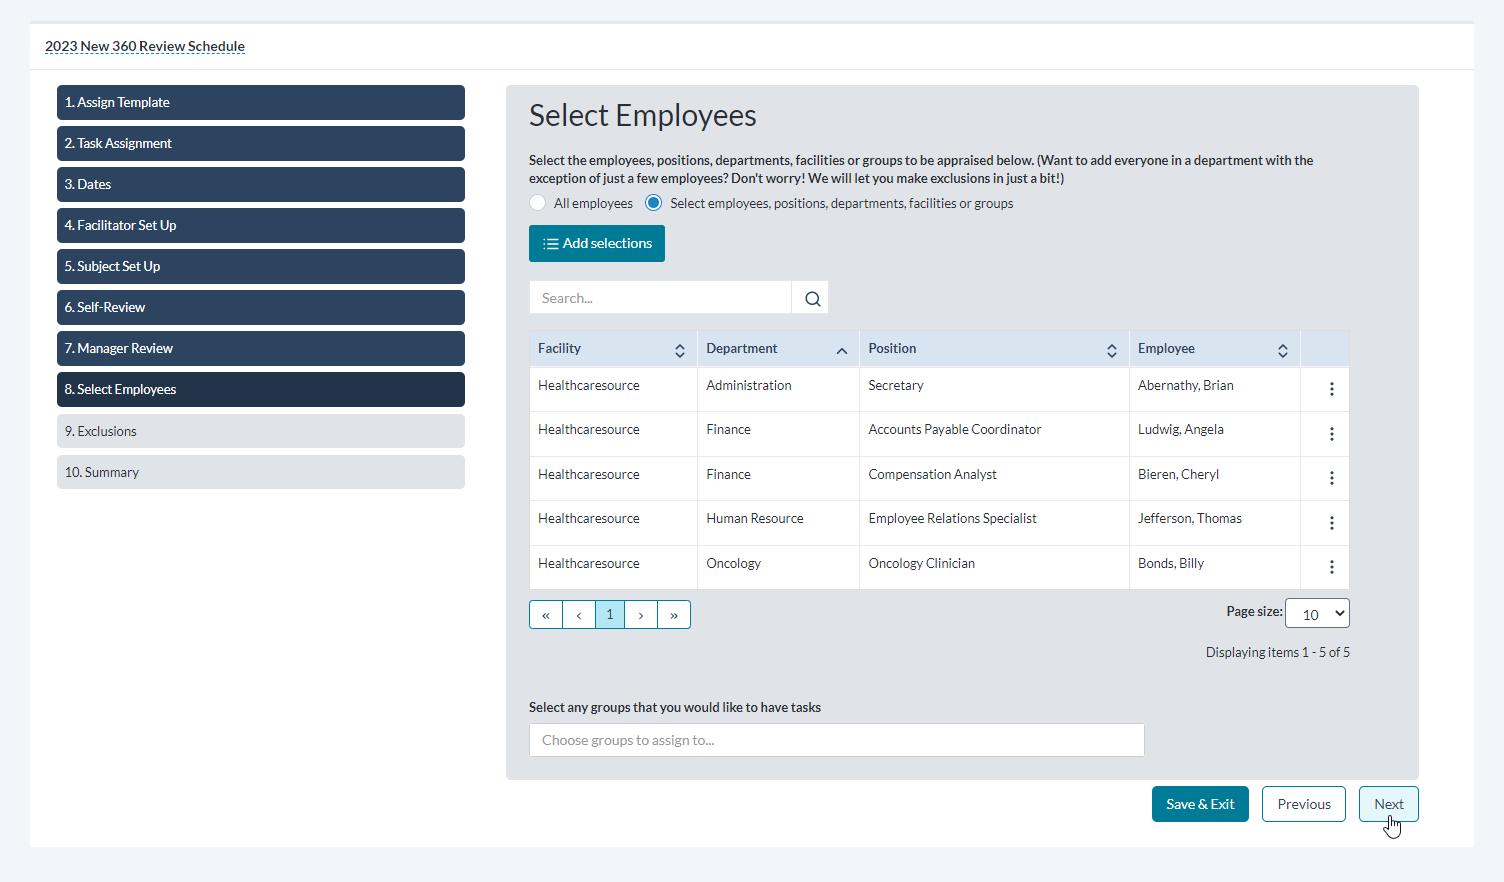
Select Employees. Select the employees, positions, departments, facilities or groups to be appraised with this review.
-
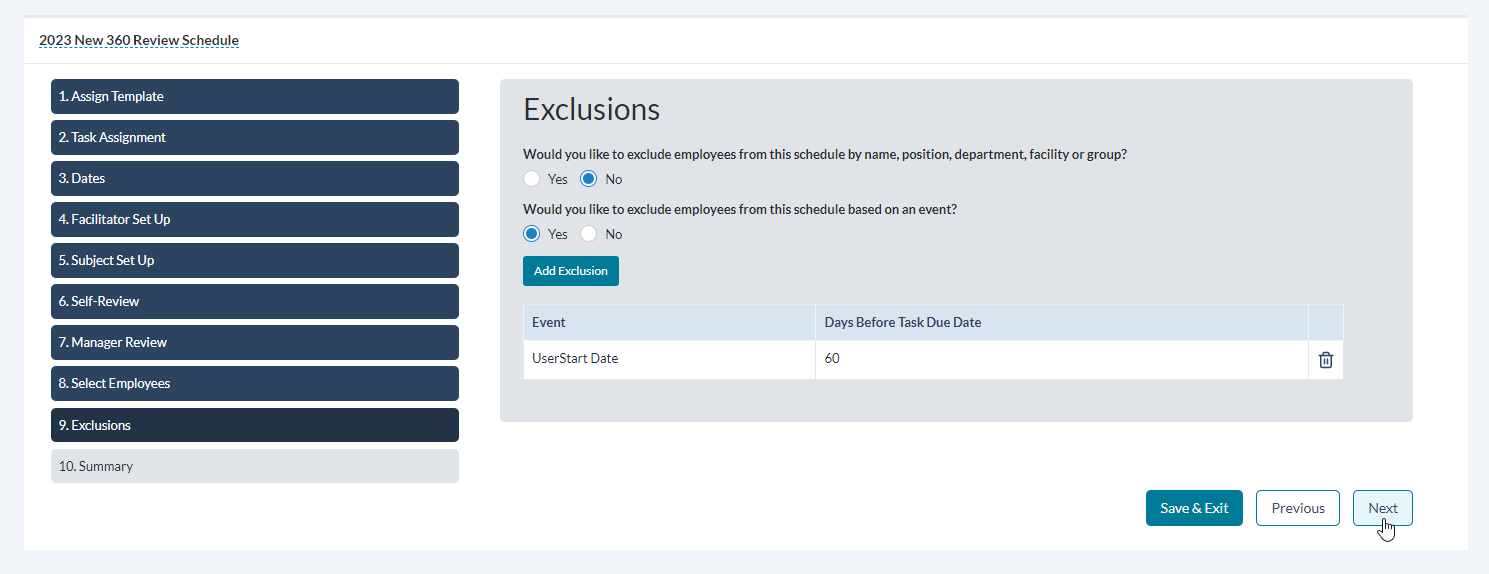
Exclusions. Decide if you like to exclude employees from this schedule by name, position, department or facility, or exclude any employees from this review based on an event (for example, if they were hired less than 60 days before the start of the review schedule).
-
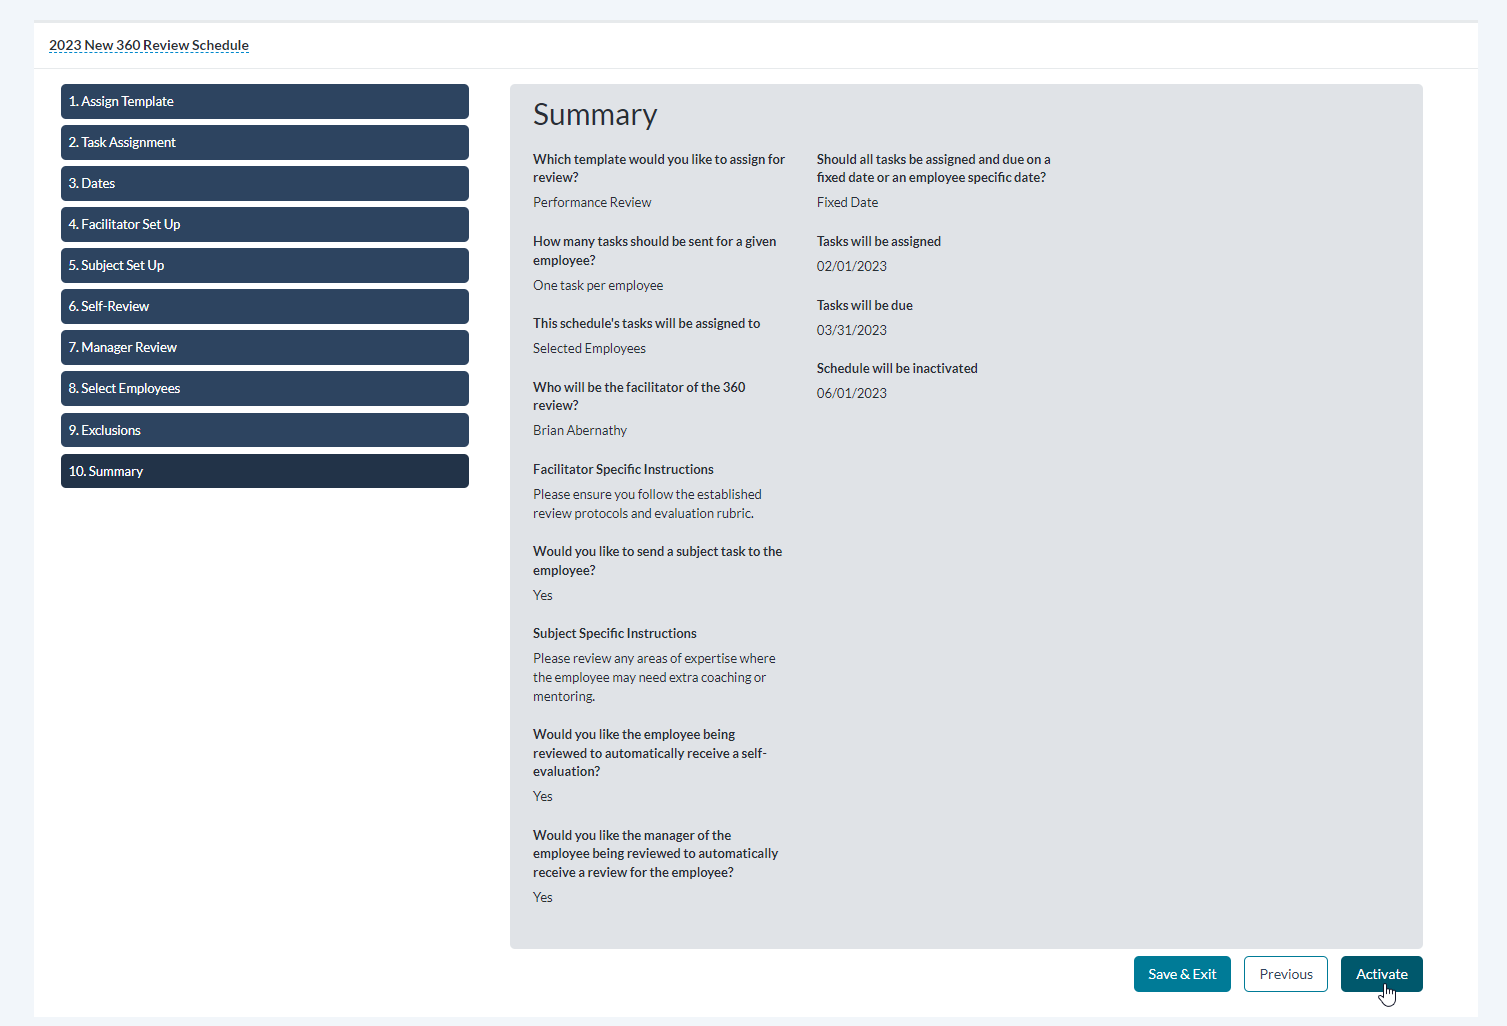
Summary. Displays all the options and selections made in the schedule. If it looks correct, selecting Activate (and confirming via the pop-up window) activates the schedule, assigns any tasks, and displays the schedule on the 360 Review Schedules list.
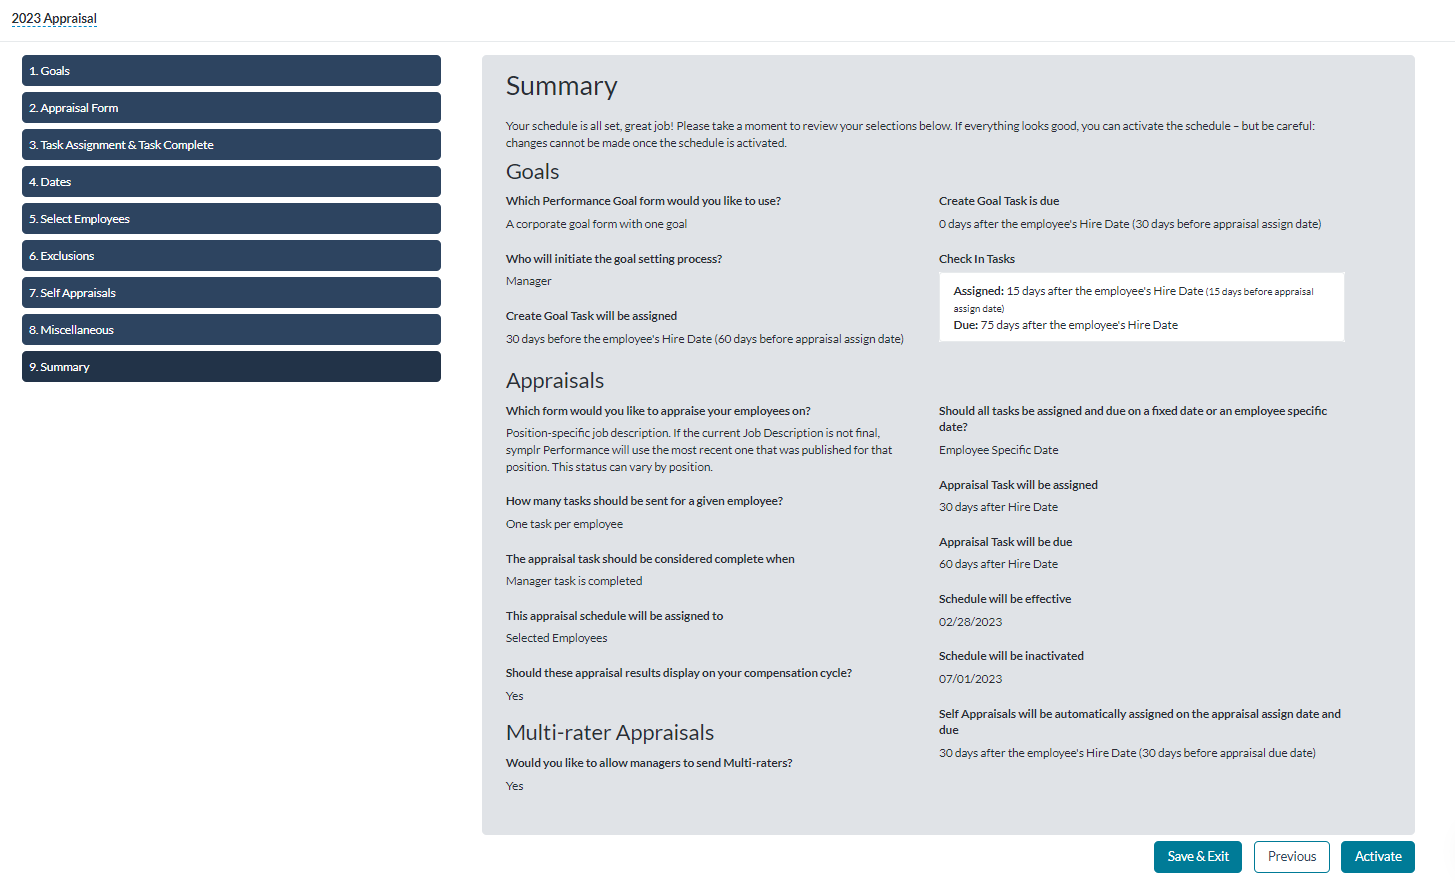
When creating a new Appraisal Schedule, you must complete a 9-step process to enter all the necessary details.
-
Goals. Select whether or not you want to include Performance Goals in the appraisal cycle. If selecting Yes, you are also prompted to select a Performance Goal form and must decide whether the Employee or Manager must initiate the goal-setting process.
-
Appraisal Form. Select whether you'd like to use a position-specific or stand-alone appraisal template, and which job description to include.
-
Task Assignment & Task Complete. Your choice here determines whether an employee receives a single review task, or is given a review task for each position they held during the schedule dates. This second option is primarily used if an employee has transferred departments or has obtained an additional position, to review each position held.
Additionally, you may set the criteria to determine when the system deems the appraisal is complete.
-
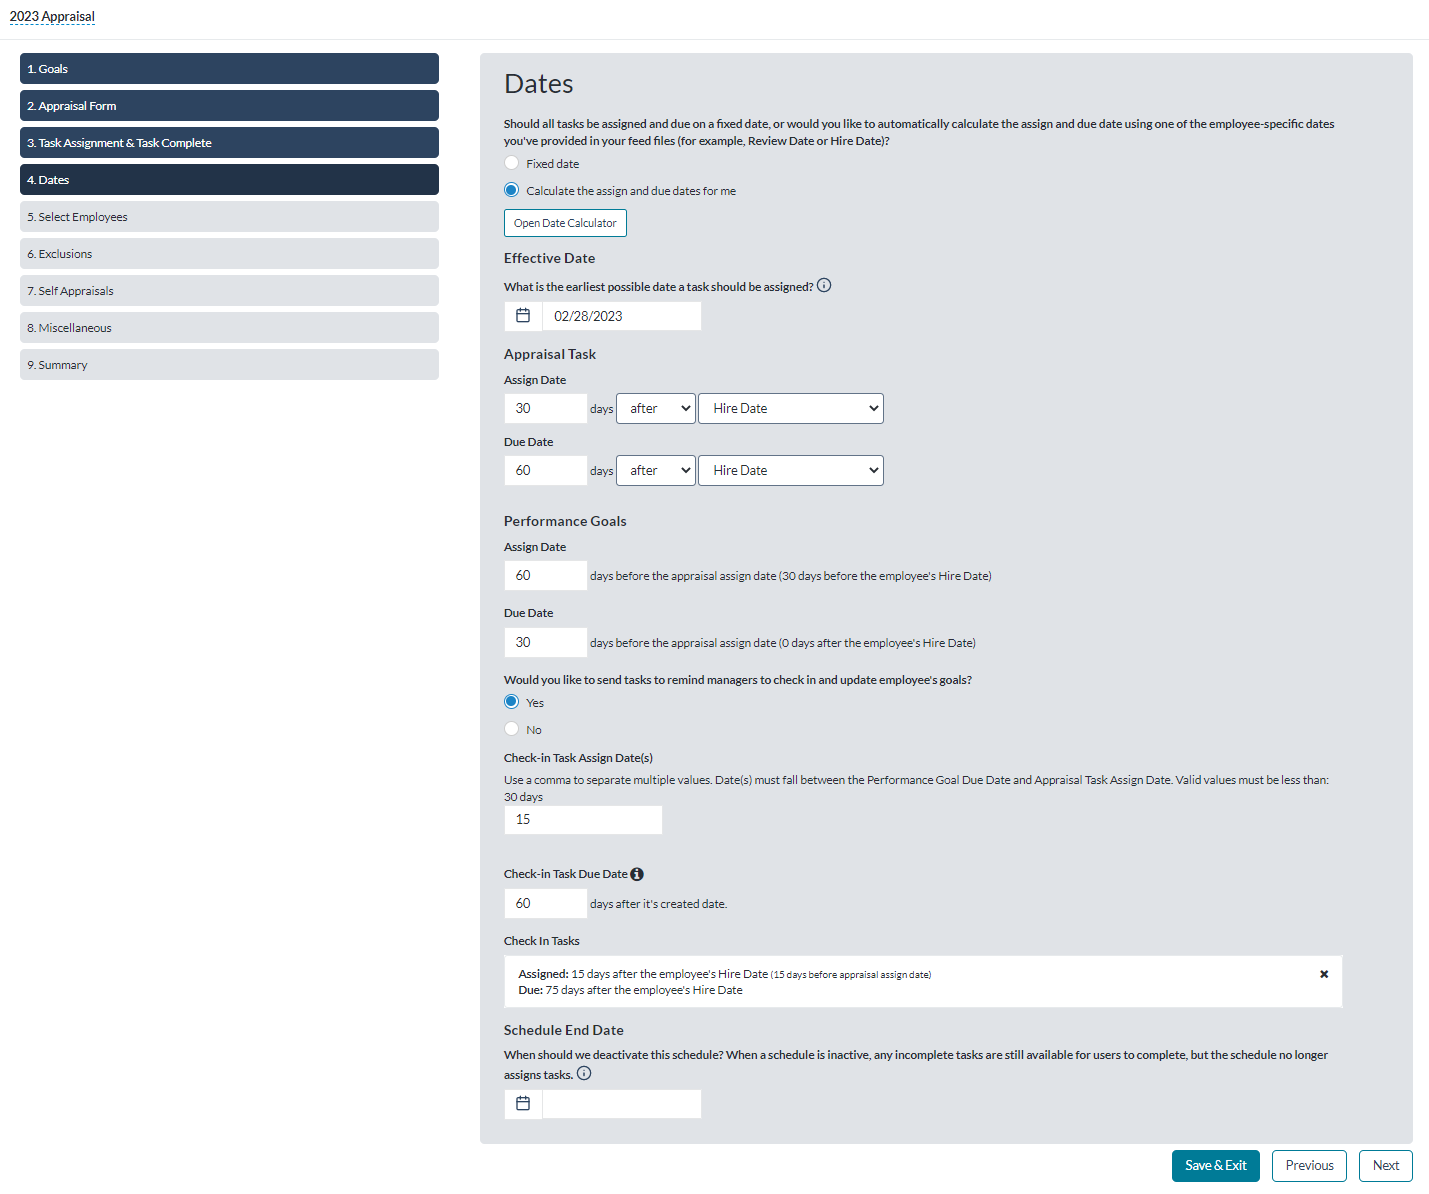
Dates. On this step, all tasks may be assigned and due based on a fixed date you enter, or can be calculated and assigned and due based on one of the employee-specific dates you provide.
-
Select Employees. Select the employees, positions, departments, facilities or groups to be appraised with this review.
-
Exclusions. Decide if you like to exclude employees from this schedule by name, position, department or facility, or exclude any employees from this review based on an event (for example, if they were hired less than 60 days before the start of the review schedule).
-
Self-Appraisals. Selecting Yes or No on this step determines whether each employee automatically receives a Self-Appraisal task.
-
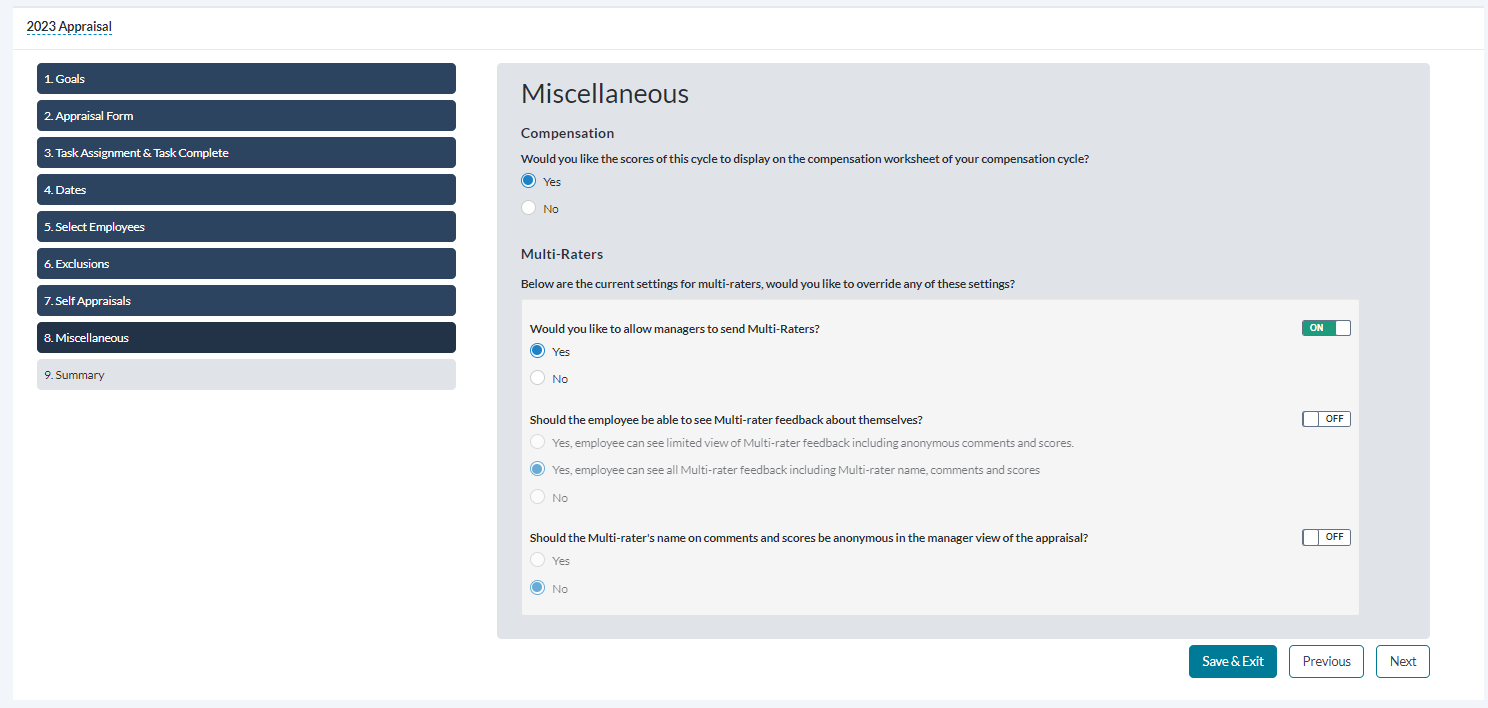
Miscellaneous. You can adjust several settings pertaining to how data from this assessment shows during compensation adjustments and how much (if any) multi-rater feedback is shown to those being evaluated.
-
Summary. Displays all the options and selections made in the schedule. If it looks correct, selecting Activate (and confirming via the pop-up window) activates the schedule, assigns any tasks, and displays the schedule on the Appraisal Schedules list.
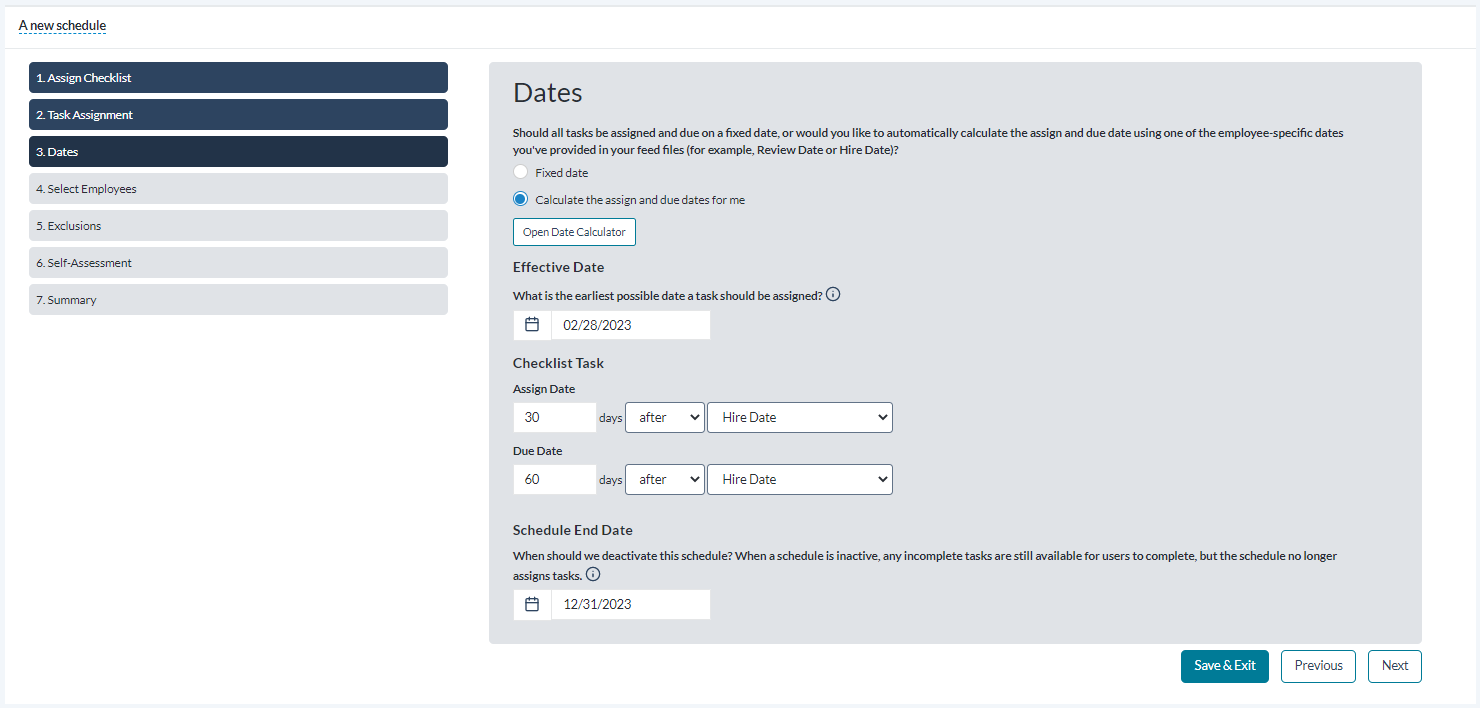
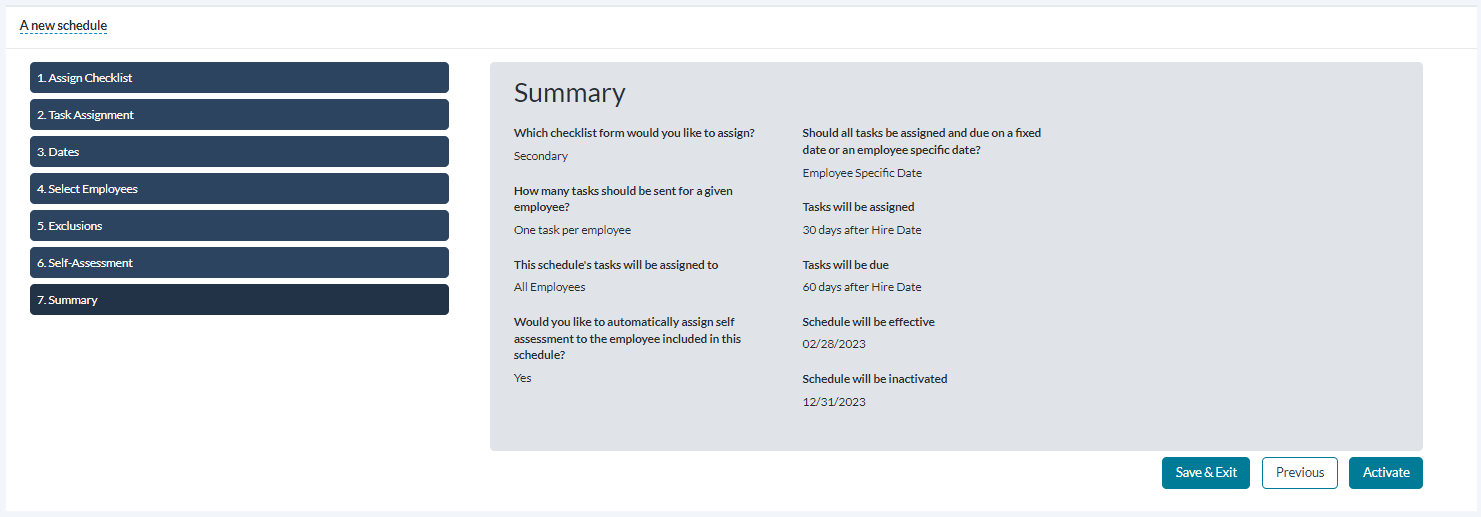
When creating a new Checklist Schedule, you must complete a 7-step process to enter all the necessary details.
-
Assign Checklist. Select an existing evaluation template from the drop-down menu. Selecting Next continues to step 2.
-
Task Assignment. Your choice here determines whether an employee receives a single review task, or is given a review task for each position they held during the schedule dates. This second option is primarily used if an employee has transferred departments or has obtained an additional position, to review each position held.
-
Dates. On this step, all tasks may be assigned and due based on a fixed date you enter, or can be calculated and assigned and due based on one of the employee-specific dates you provide.
-
Select Employees. Select the employees, positions, departments, facilities or groups to be assigned with this task.
-
Exclusions. Decide if you like to exclude employees from this schedule by name, position, department or facility, or exclude any employees from this review based on an event (for example, if they were hired less than 60 days before the start of the review schedule).
-
Self-Assessment. Selecting Yes or No on this step determines whether each employee receives a Self-Assessment task in addition to their Checklist task.
-
Summary. Displays all the options and selections made in the schedule. If it looks correct, selecting Activate (and confirming via the pop-up window) activates the schedule, assigns any tasks, and displays the schedule on the Checklist Schedules list.
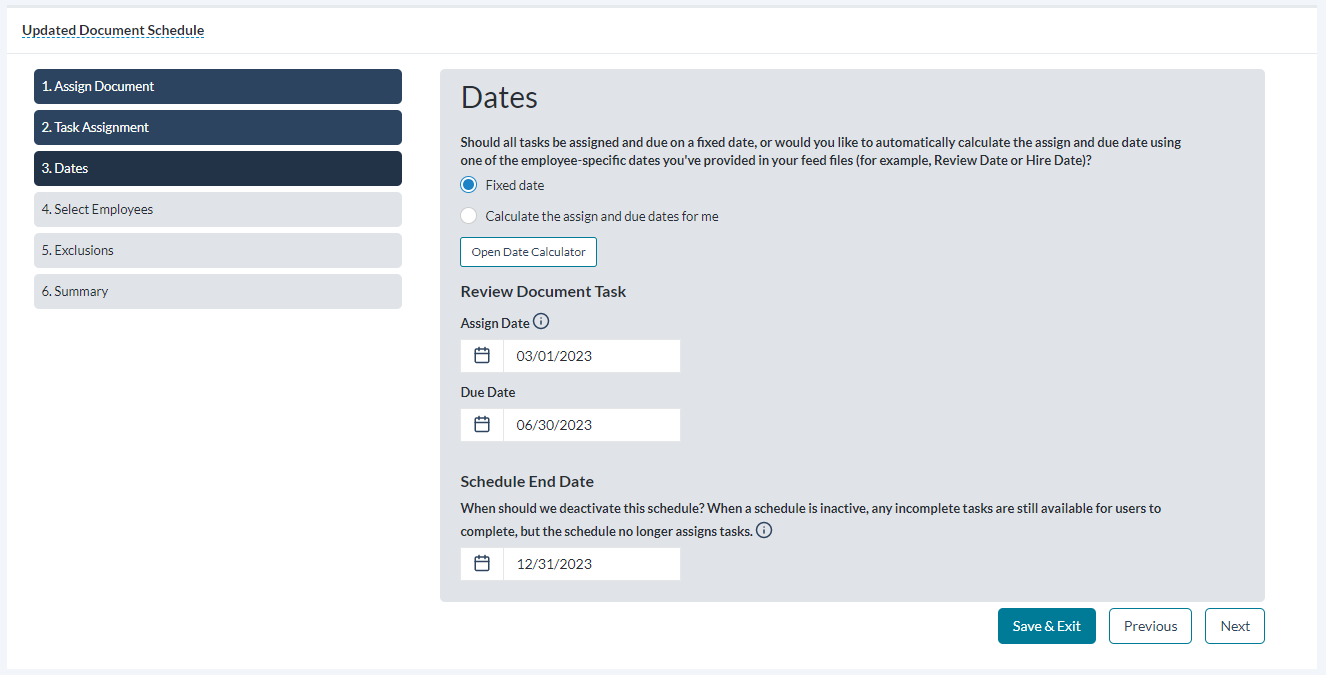
When creating a new Document Schedule, you must complete a 6-step process to enter all the necessary details.
-
Assign Doocument. Select an existing document to assign from the drop-down menu. Selecting Next continues to step 2.
-
Task Assignment. Your choice here determines whether an employee receives a single review task, or is given a review task for each position they held during the schedule dates. This second option is primarily used if an employee has transferred departments or has obtained an additional position, to review each position held.
-
Dates. On this step, all tasks may be assigned and due based on a fixed date you enter, or can be calculated and assigned and due based on one of the employee-specific dates you provide.
-
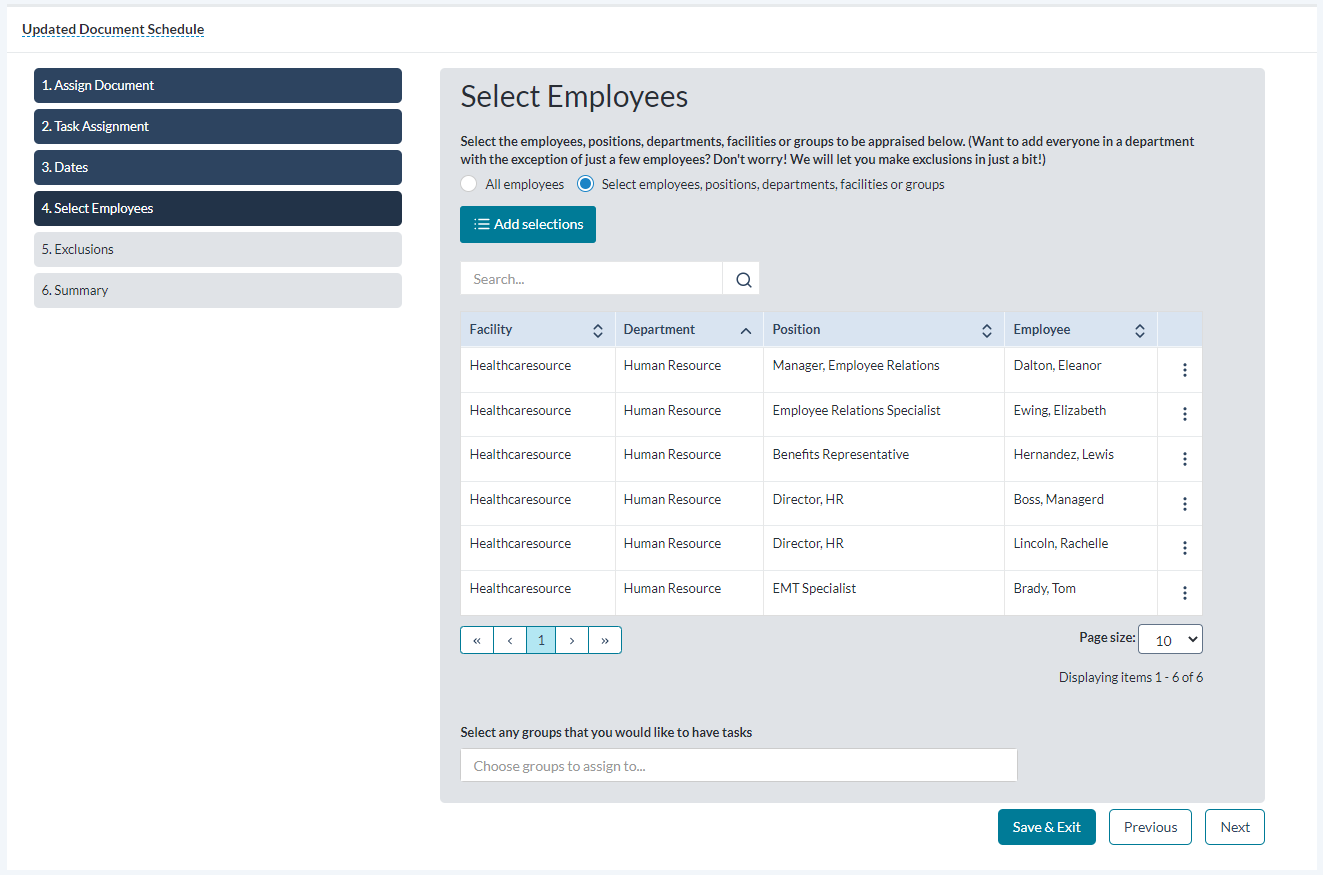
Select Employees. Select the employees, positions, departments, facilities or groups to be assigned with this document review.
-
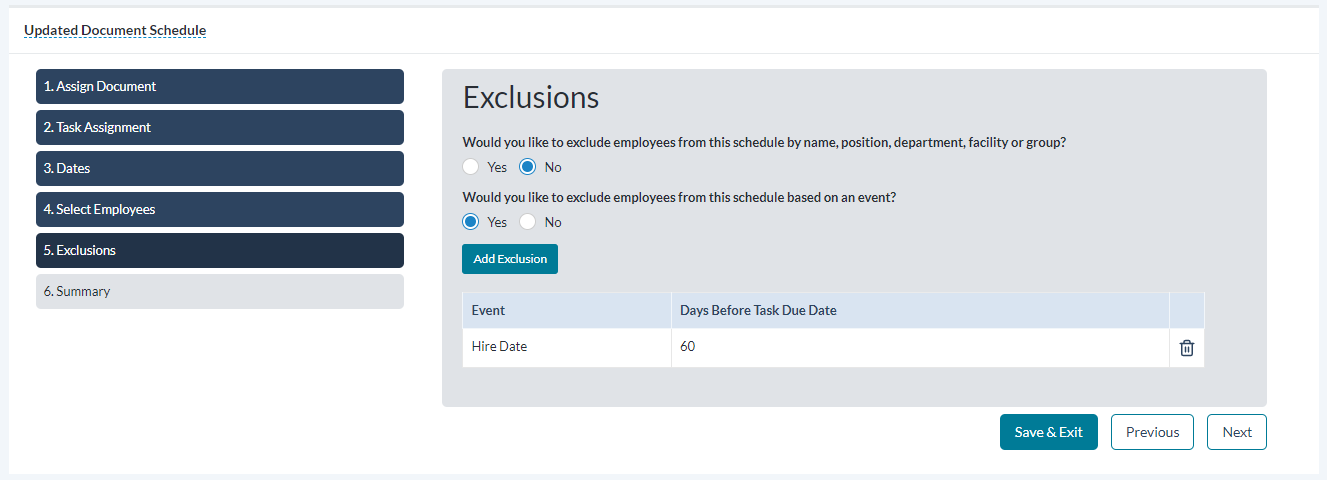
Exclusions. Decide if you like to exclude employees from this schedule by name, position, department or facility, or exclude any employees from this review based on an event (for example, if they were hired less than 60 days before the start of the review schedule).
-
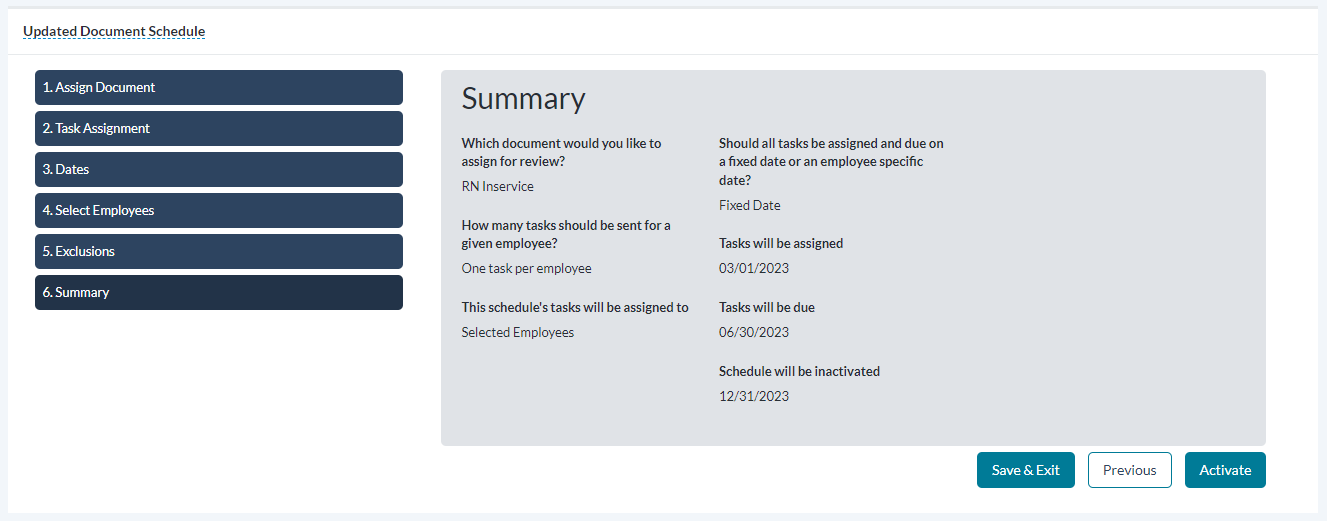
Summary. Displays all the options and selections made in the schedule. If it looks correct, selecting Activate (and confirming via the pop-up window) activates the schedule, assigns any tasks, and displays the schedule on the Document Review Schedules list.
