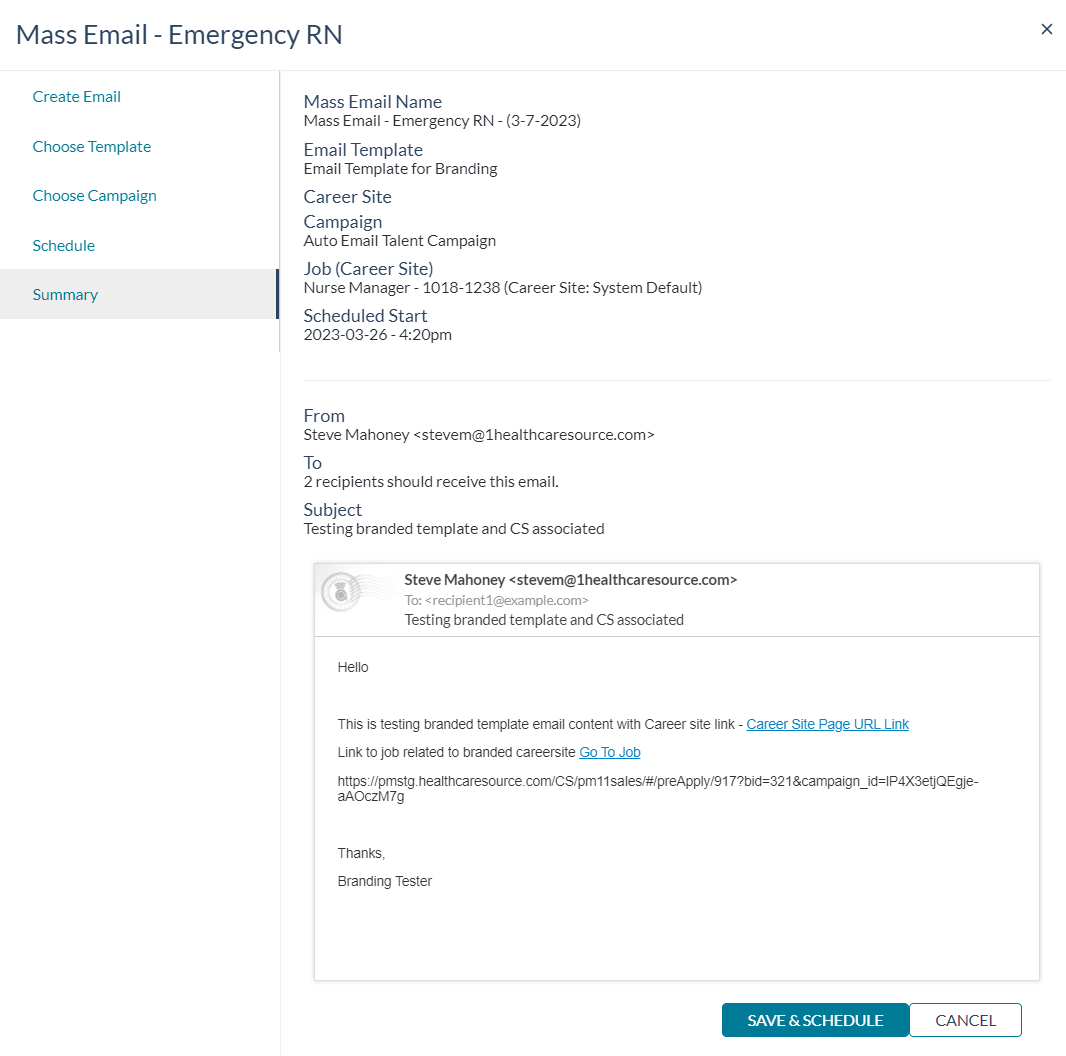
Mass email wizard
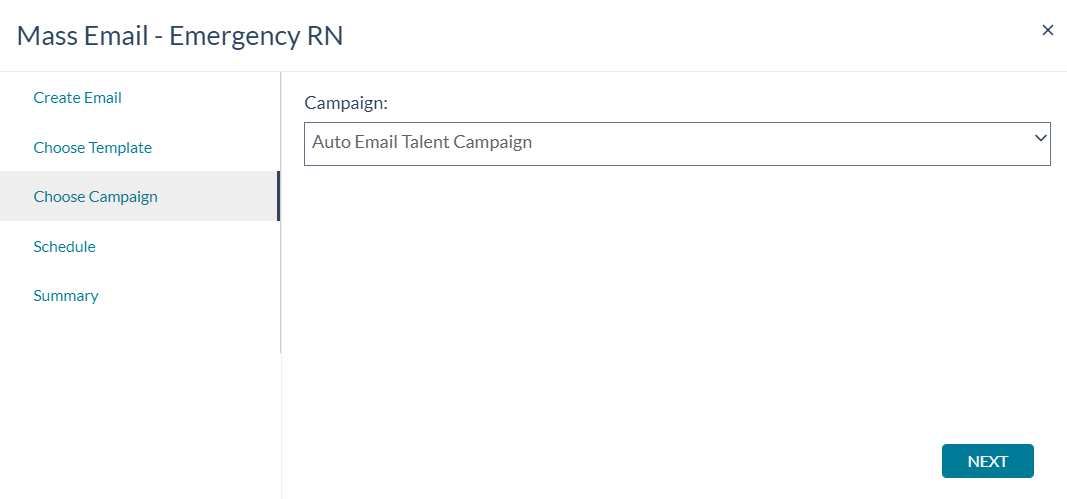
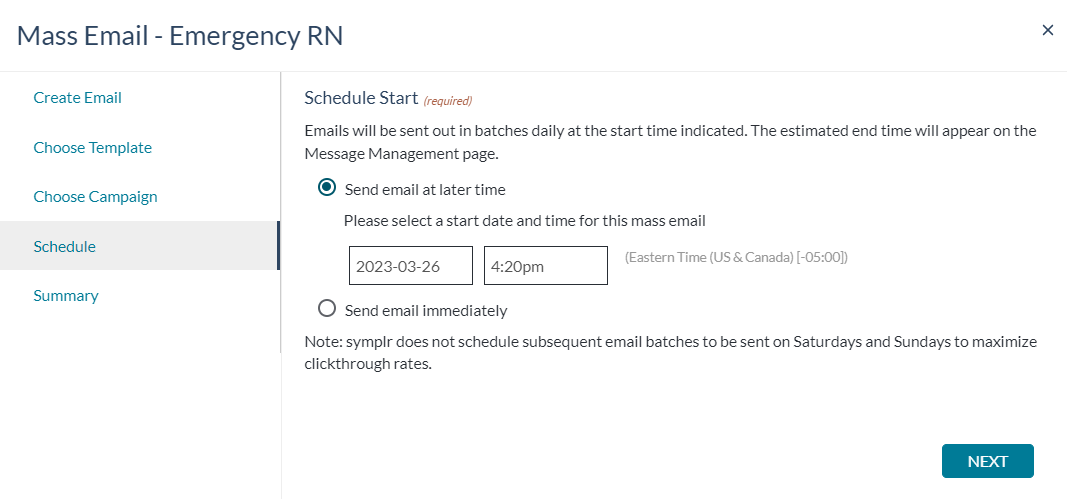
The mass email wizard consists of five steps that walks you through the necessary information. Clicking Next advances you to the next step in the wizard.
Select a step to learn more about the fields found in each area.
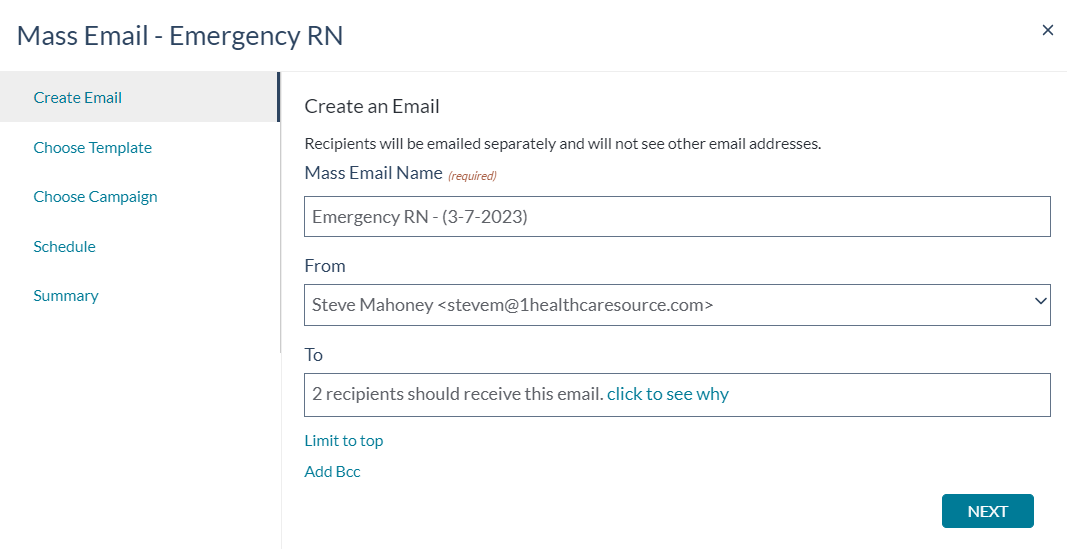
The first step of the wizard gathers basic details about the mass email, including options for narrowing recipient lists.
- Mass Email Name. Provide a name for the mass email. This helps you identify emails sent as part of the mass email in the Email Activity Report. This field defaults to the active search on the page where the mass email wizard is launched.
- From. Select from the drop-down list, or enter a new email address as needed.
-
To. This field indicates how many candidates will receive the mass email. This defaults to candidates that appear in the active search on the page where the mass email wizard is launched.
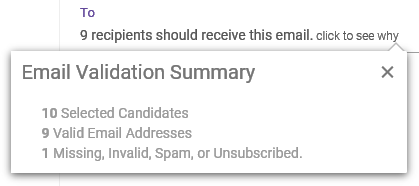
Details about how that number of recipients is determined can be viewed by clicking the click to see why link, which opens an Email Validation Summary pop-up window.
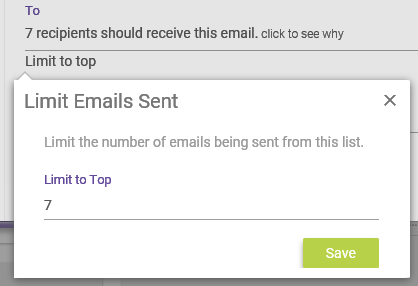
The Limit to top link under the To field provides the ability to restrict the mass email to only the top number of candidates shown on the current page.
You can also add additional recipients by clicking the Add Bcc link to display the Bcc field for manually entering email addresses. This is helpful if you want to receive a copy of the email yourself, to confirm sending and/or review yourself.
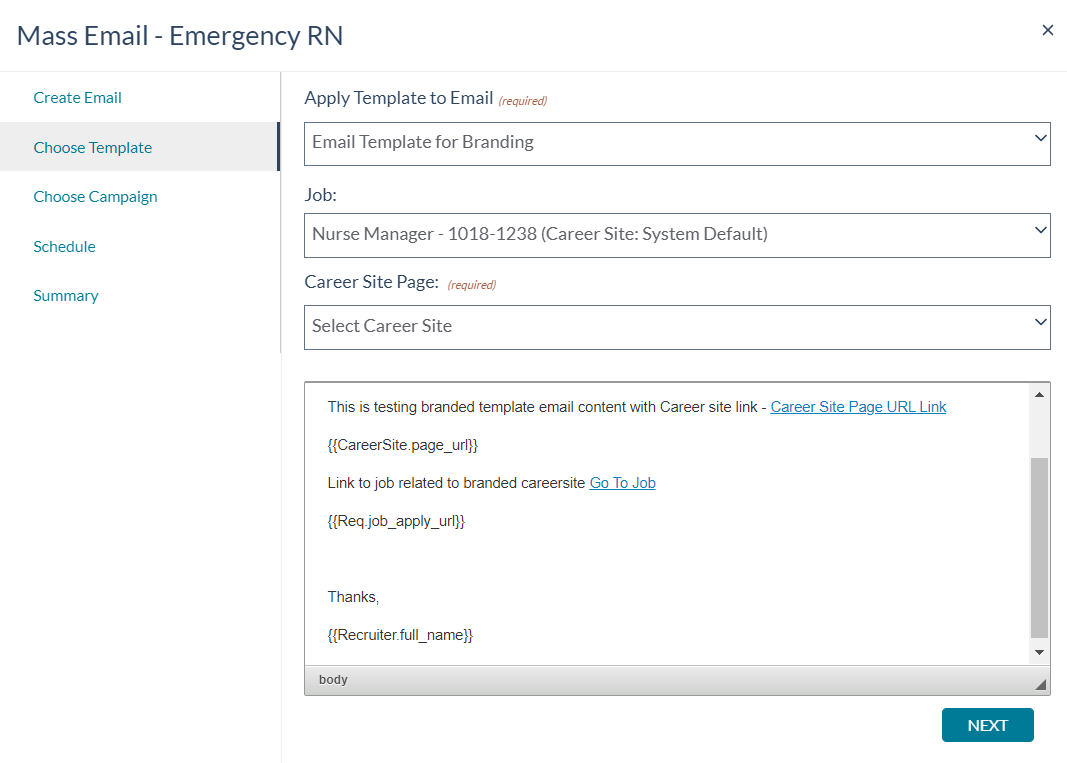
The step allows you to select an email template and choose a specific job to send to candidates.
- Apply Template to Email. Drop-down list containing all the available email templates. Selecting one populates the text field with contents of the template.
- Job. Drop-down list containing all available job postings. This selection determines which job recipients are linked to from the email.
- Career Site Page. For users with multiple career sites, this field allows you to select a specific career site and page within that site to link to within the email.
The final step of the wizard simply presents all the information collected for the mass email in a summary view, including an example of the email candidates will receive.
You can return to previous steps to make edits if necessary by selecting the desired step from the list on the left of the wizard. Once Save and Schedule is clicked, the mass email activates and sends at the specified date and time.
