Mass-Importing Candidates
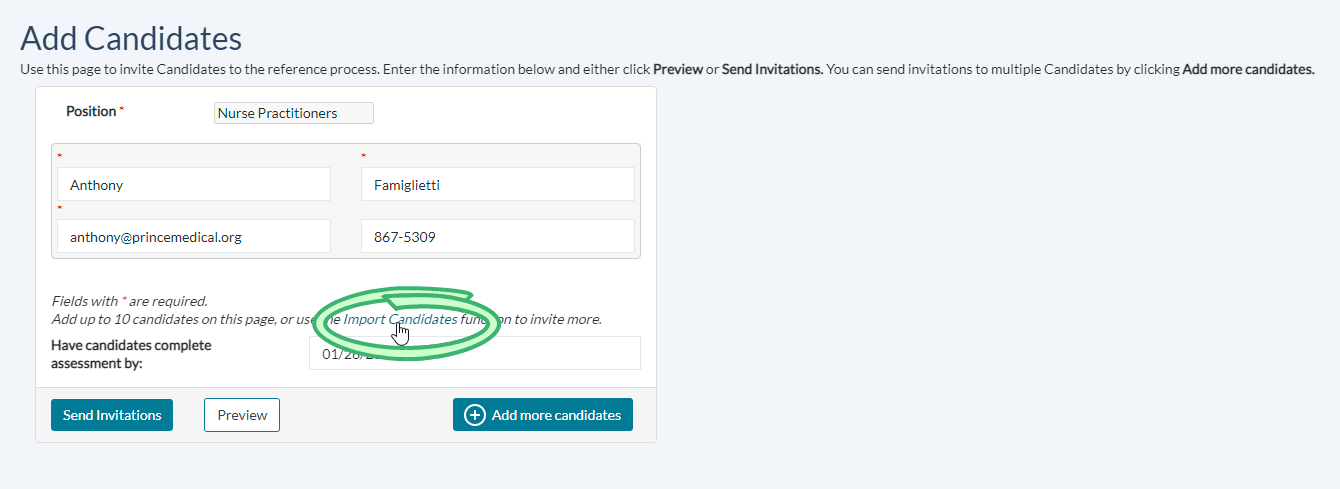
To add more than 10 candidates from the Add Candidates page, click the Import Candidates link found in a line of text near the bottom of the page. Clicking this link displays the Import Candidates page.
Note: The Import Candidates page is only accessible via the link on the Add Candidates page.
Importing a batch of candidates is handled via the following steps.
-
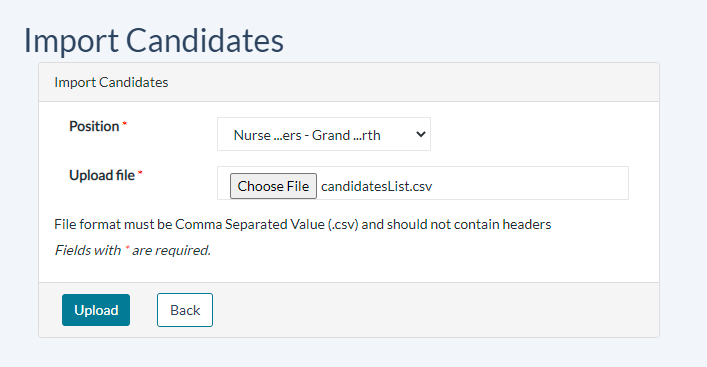
Select a position from the available listings in the Position drop-down menu.
-
Clicking Choose File opens a file select popup, where you'll locate your candidate import file.
Note: If you still need to create a candidate import file, follow the steps outlined in the section below.
-
Click Open when you've found your file in the file select popup. After it's selected, the file's name appears next to the Choose File button.
-
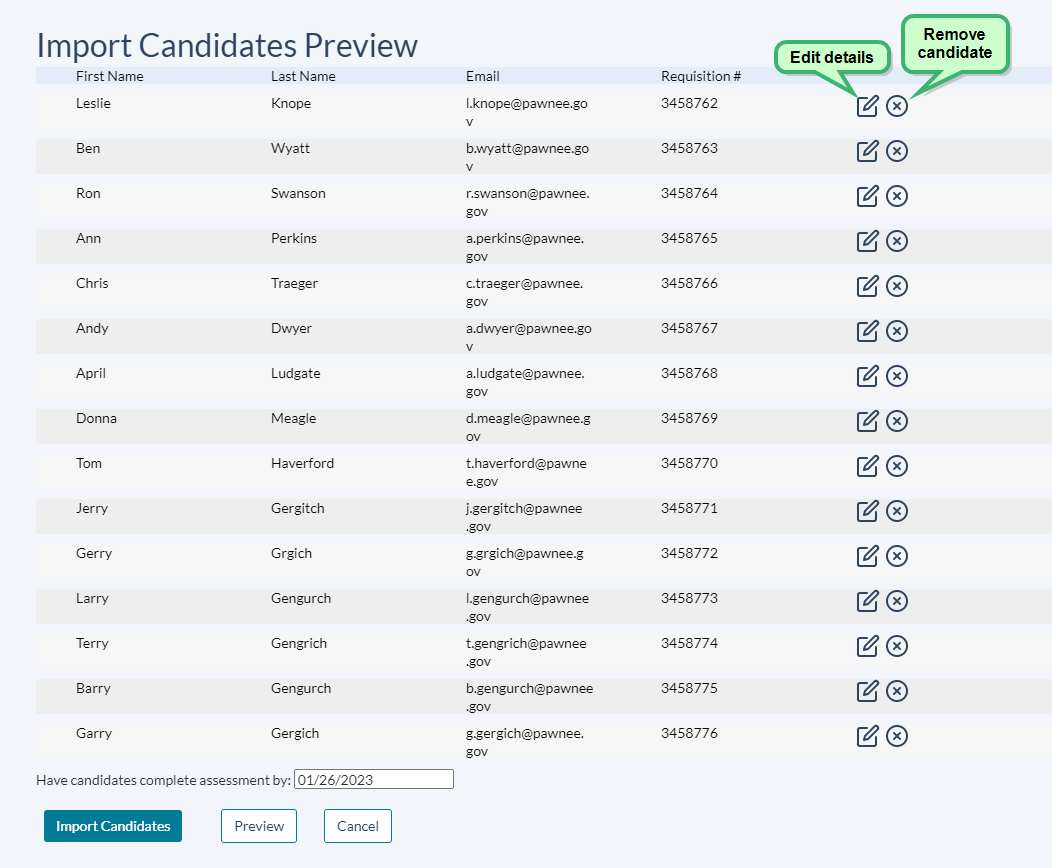
Clicking the Upload button imports your file. When this is done, the Import Candidates Preview page displays. Here you can get a look at how your import file has been processed.
If you need to make any edits to the data, clicking the edit icon enables you to make adjustments to specific candidates' details. If there are any data validation errors, they will be flagged and you may fix any errors by entering a correction into any applicable fields.
Alternately, clicking an X icon removes an individual candidate from the import list.
-
Select a deadline for the candidates to have their reference assessments completed by clicking the Date field and choosing a date from the calendar display, or type in a date in the MM/DD/YYYY format.
-
When everything looks perfect, clicking Import Candidates adds them all to the Reference Assessment system. The Import Candidates page displays with a confirmation message after the process finishes.
-
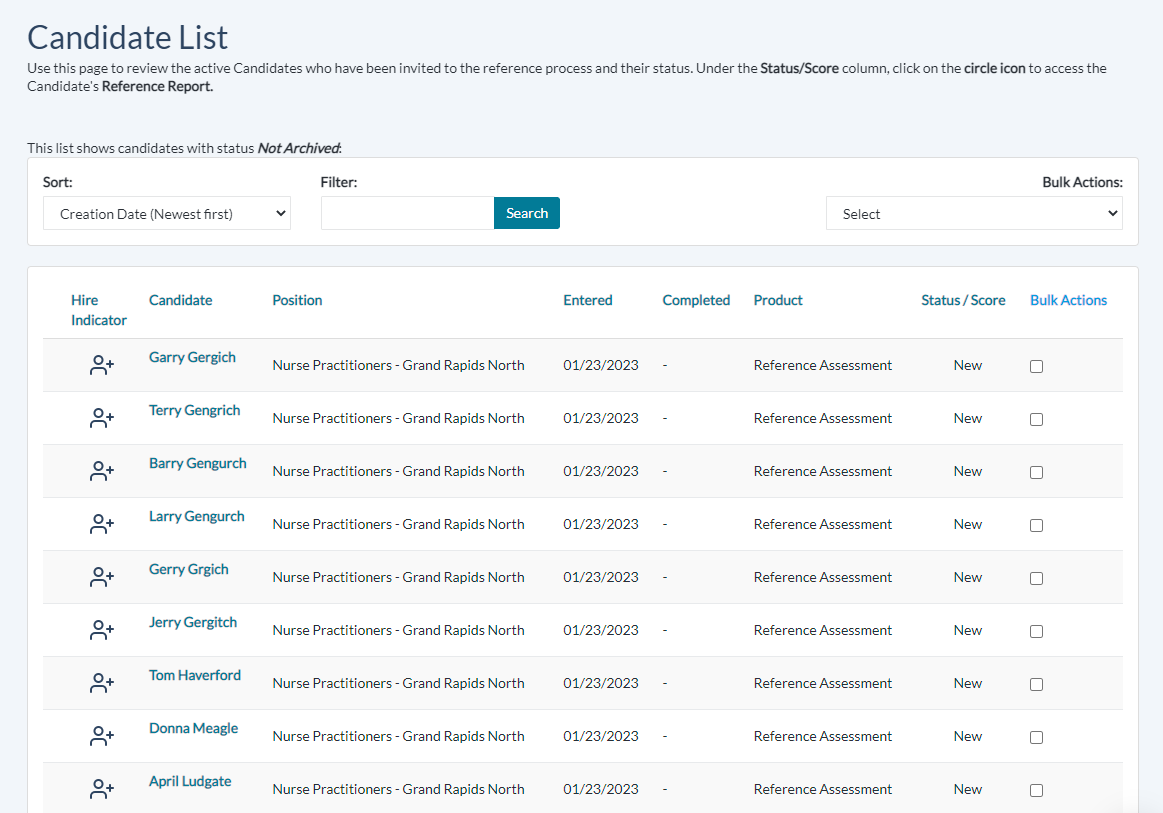
Verify the addition of your candidates by checking your organization's Candidate List page. Sort the data to show the most recent additions first, and you'll notice your candidates have all been added exactly as specified.
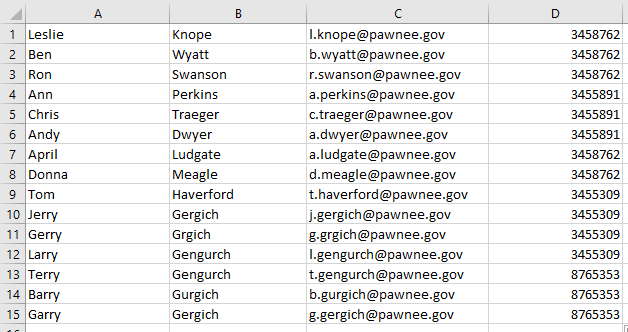
In order to mass import candidates, they must all be compiled into a spreadsheet file saved in the .csv format. The spreadsheet must be organized in a precise format and order. The candidate data should be arranged in four columns in the following order:
- First name
- Last name
- Email address
- Requisition Number (optional)
There should be no column headers. For an example of how a properly-formatted sheet could appear, take a look at the screenshot above.
To save an Excel spreadsheet as a .csv file, follow these steps:
- From within Microsoft Excel, select Save As from the File menu.
- Type a name for your import file in the File Name field.
- Select the CSV (Comma delineated) (*.csv) option from the Save As Type drop-down menu.
- Clicking Save saves your .csv file in the specified file location. Congratulations- you now have a candidate import file!
