Adding New Positions
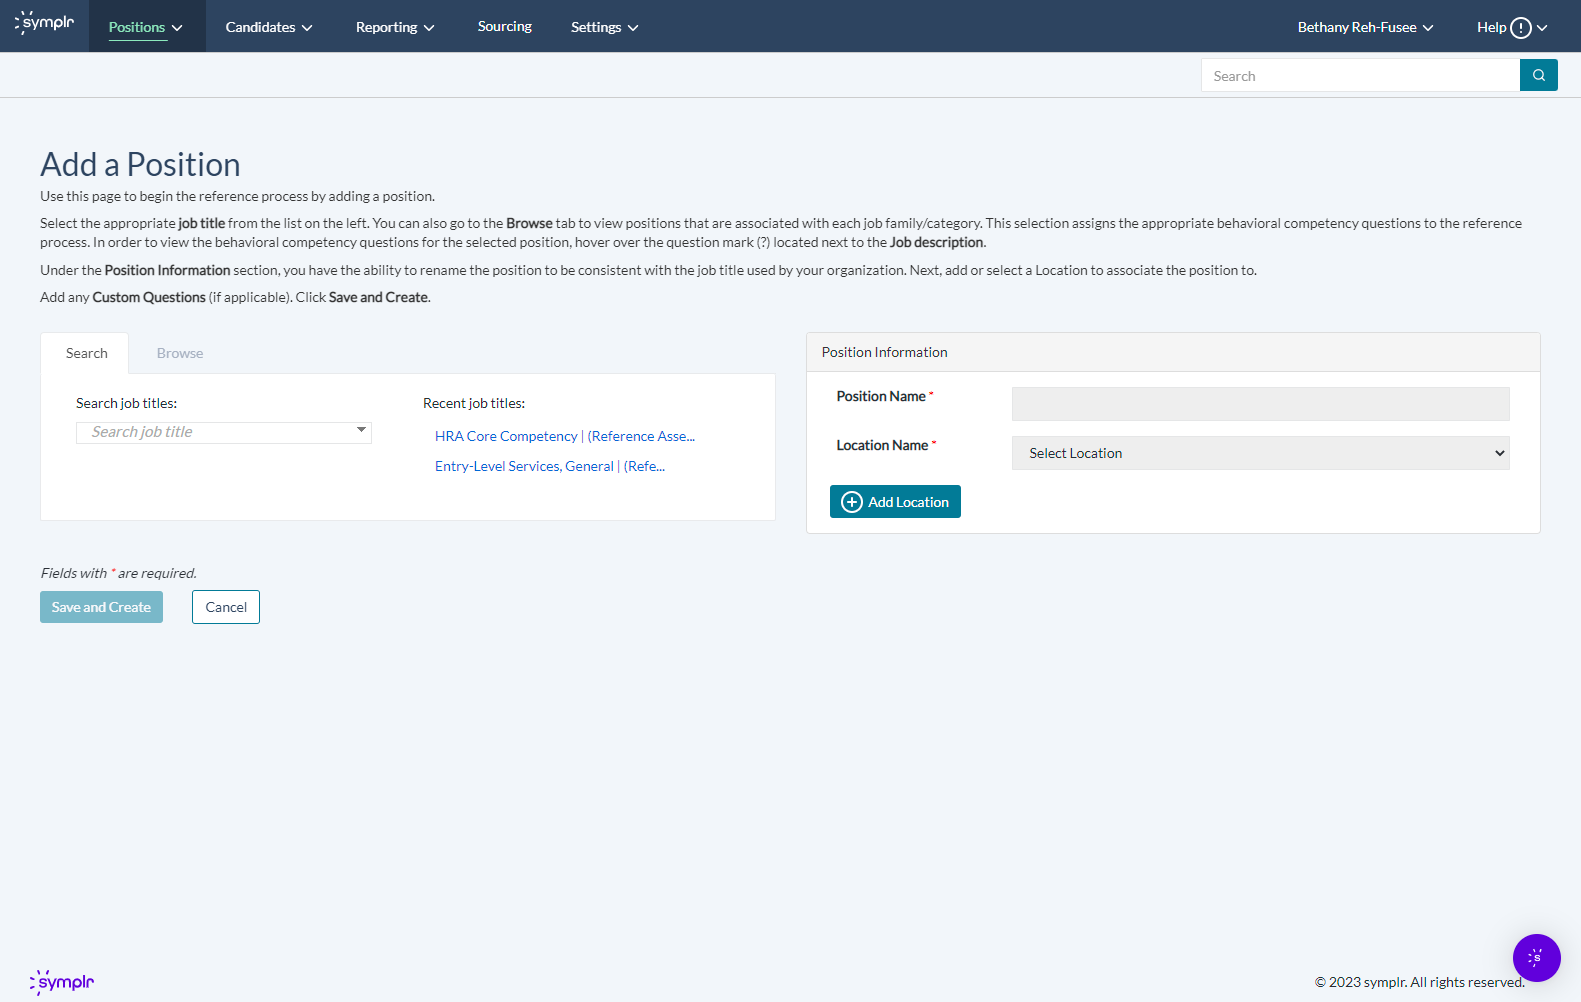
The Add Positions page allows you to add positions to begin the reference assessment process. This is done by finding and selecting an existing job title, picking the desired location, then adding any custom questions as needed. Upon saving, any positions created here appear in the My Positions page.
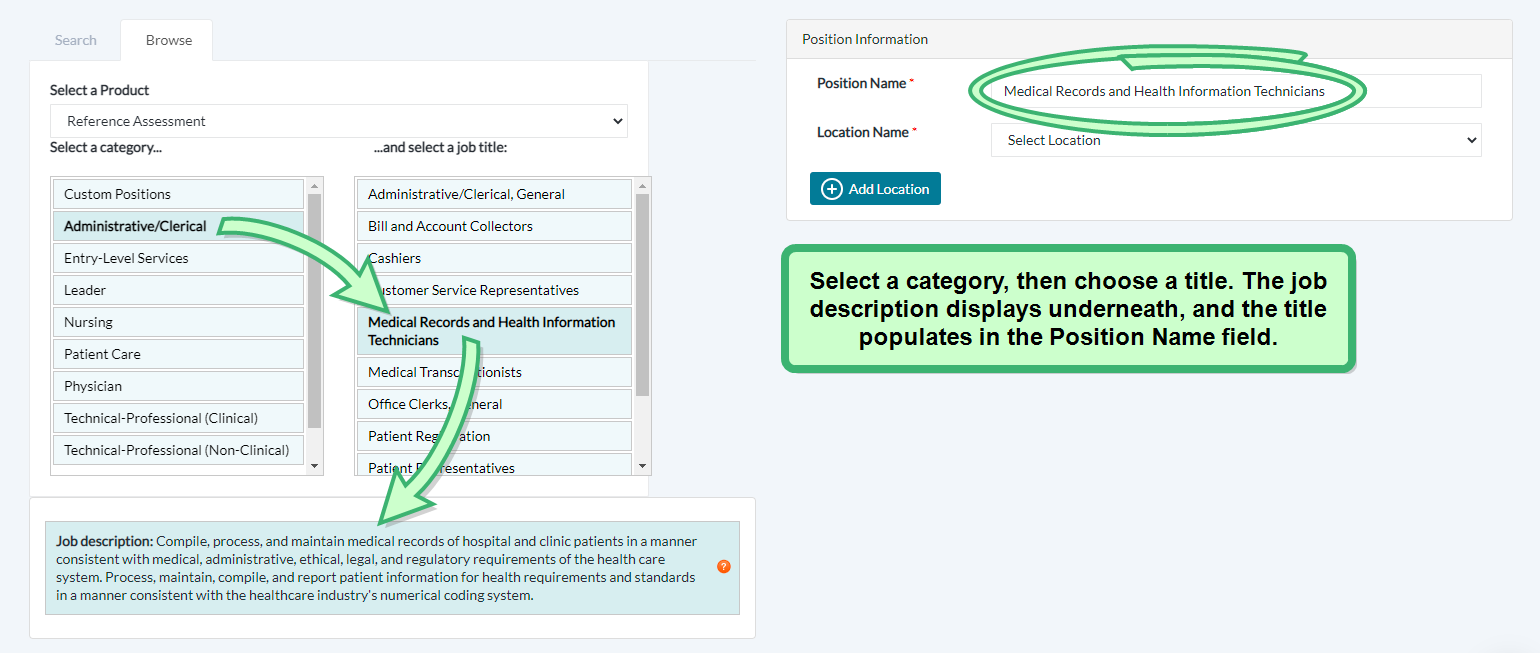
There are two different methods to add positions: Searching and Browsing. Searching allows you to freely search for a specific job title matching the role you need to add. Browsing presents you with a list of job categories, allowing you to pick and choose the desired category and title. Clicking a job category then displays any job titles associated with that category.
Whether searching or browsing, choosing a job title from the established list ensures the appropriate competency questions are assigned to the assessment. After choosing a job title, the Position Name field automatically populates with a name. You may revise this name, if needed.
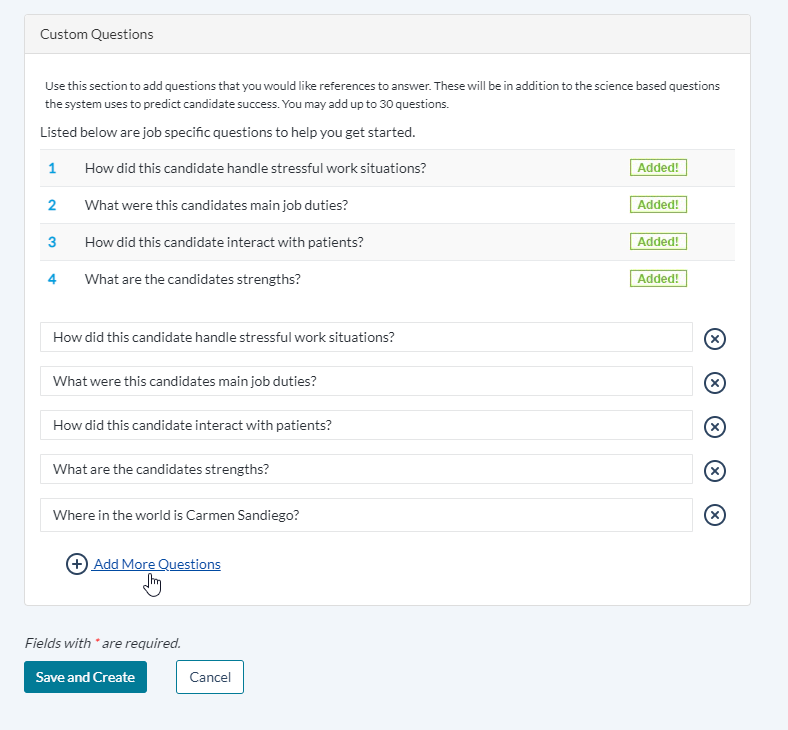
Upon entering the position name and picking a location, the list of custom questions displays in the Custom Questions section. you can add as many as 30 custom reference questions (or none at all). When you're satisfied with how the position is looking, clicking Save and Create publishes the position.
Adding a position using the Search feature is handled in a few quick steps.
-
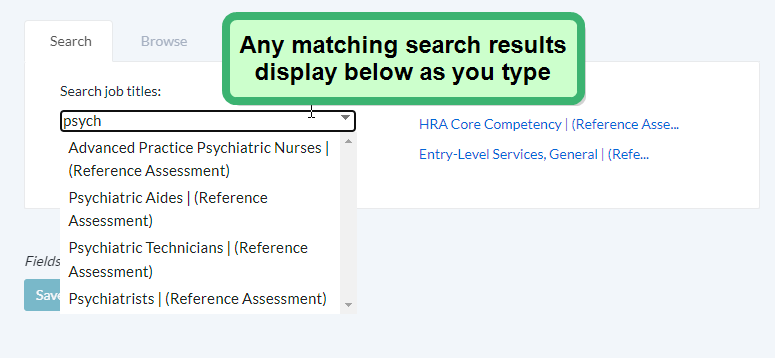
While the Search feature is active, enter your search terms into the Search field. Any results matching what you've typed display in the drop-down menu below as you type. Any recently-used job titles display to the right of the Search field.
-
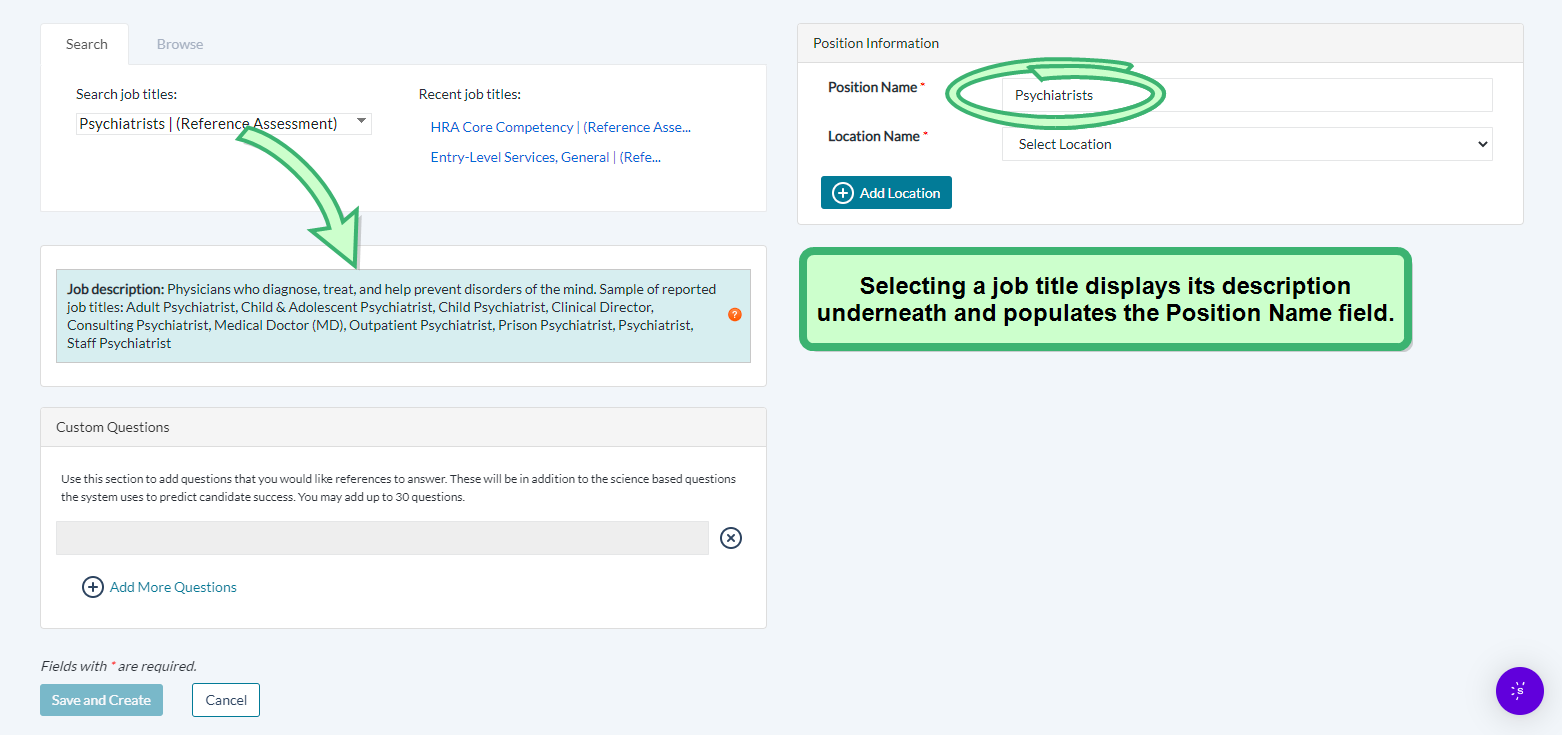
Select the desired job title from the list of results by clicking it. This displays the Job Description underneath, and populates the Position Name field with the job title.
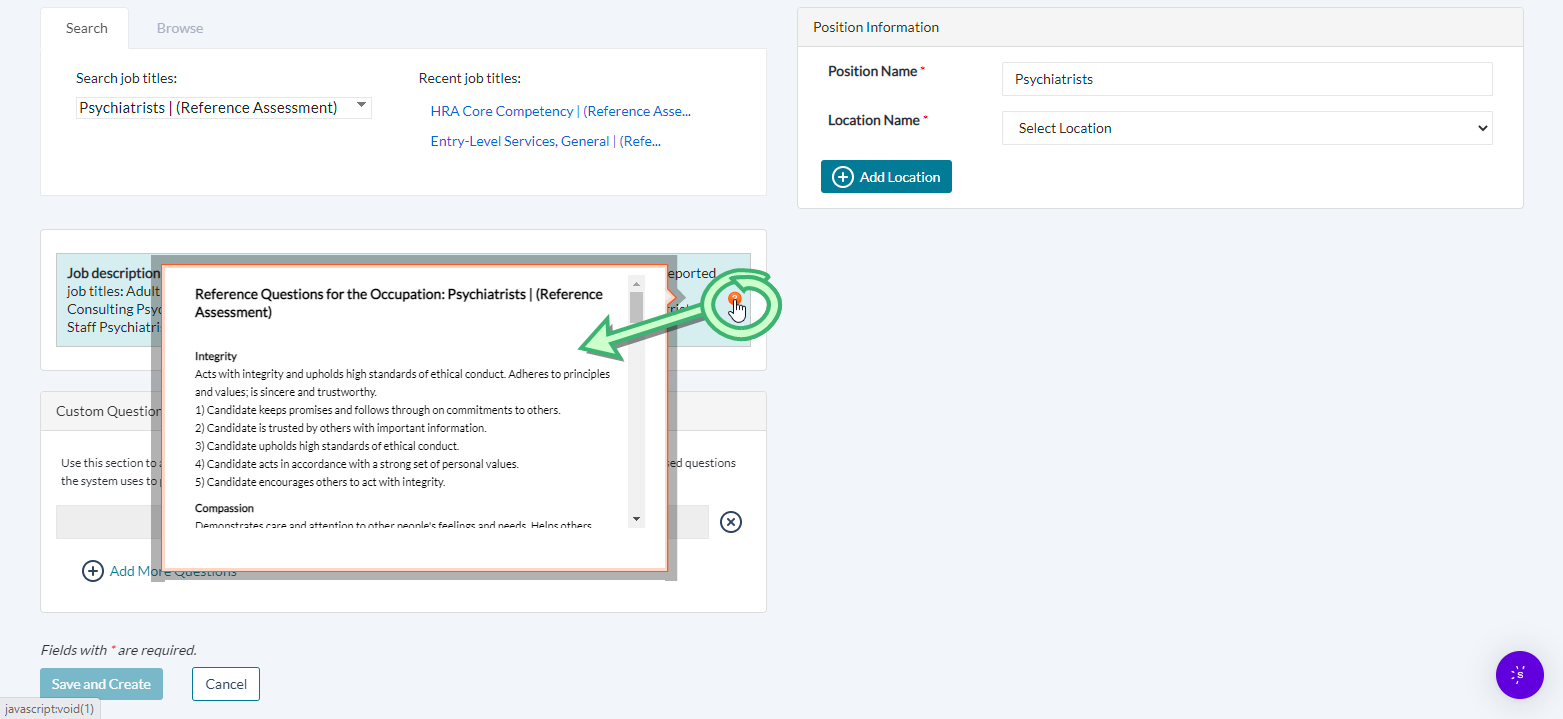
Tip: An orange question mark icon (
 ) displays next to the job description. Hovering your cursor over this icon displays a preview window containing the reference questions for the occupation. Scroll through this preview window to examine the exact questions that are asked to a candidate's references.
-
If you'd like to edit the Position Name to be consistent with the job title used by your organization, do so by clicking into its text field and typing the desired name.
-
Choose a location for this job by picking an option from the Location Name drop-down field.
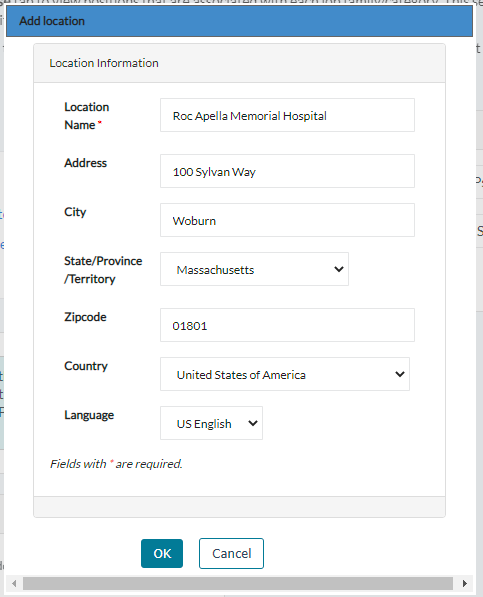
If you'd like to post to a location not listed in the available options, click the Add Location icon, enter as many location details as you can, then click OK.
Upon selecting a location, the Custom Questions area fills with any starter questions assigned to the position.
-
Add more questions (up to 30), edit existing questions, or remove questions as needed. For more detail on adding, editing, and removing custom questions, please refer to the Custom Questions section below.
- When the position is complete, selecting Save and Create publishes your new position and displays the My Positions page.
Adding a position using the Browse feature is handled in a few quick steps.
-
While Browse is active, first select a category by clicking it. Any job titles belonging to that category are displayed in the box to the right.
-
Select the desired job title by clicking it. This displays its Job Description, and populates the Position Name field with the job title.
Tip: An orange question mark icon (
 ) displays next to the job description. Hovering your cursor over this icon displays a preview window containing the reference questions for the occupation. Scroll through this preview window to examine the exact questions that are asked to a candidate's references.
-
If you'd like to edit the Position Name, do so by clicking into its text field and typing the desired name.
-
Choose a location for this job by picking an option from the Location Name drop-down field.
If you'd like to post to a location not listed in the available options, click the Add Location icon, enter as many location details as you can, then click OK.
Upon selecting a location, the Custom Questions area activates.
-
Add more questions (up to 30), edit existing questions, or remove questions as needed. For more detail on adding, editing, and removing custom questions, please refer to the Custom Questions section below.
-
When the position is complete, click Save and Create to publish your new position and display the My Positions page.
Using the Custom Questions section enables you to add your own specific questions that you want references to answer as part of their assessments. You can add up to 30 questions that will be asked, in addition to the pre-assigned questions used to predict a candidate's professional aptitude.
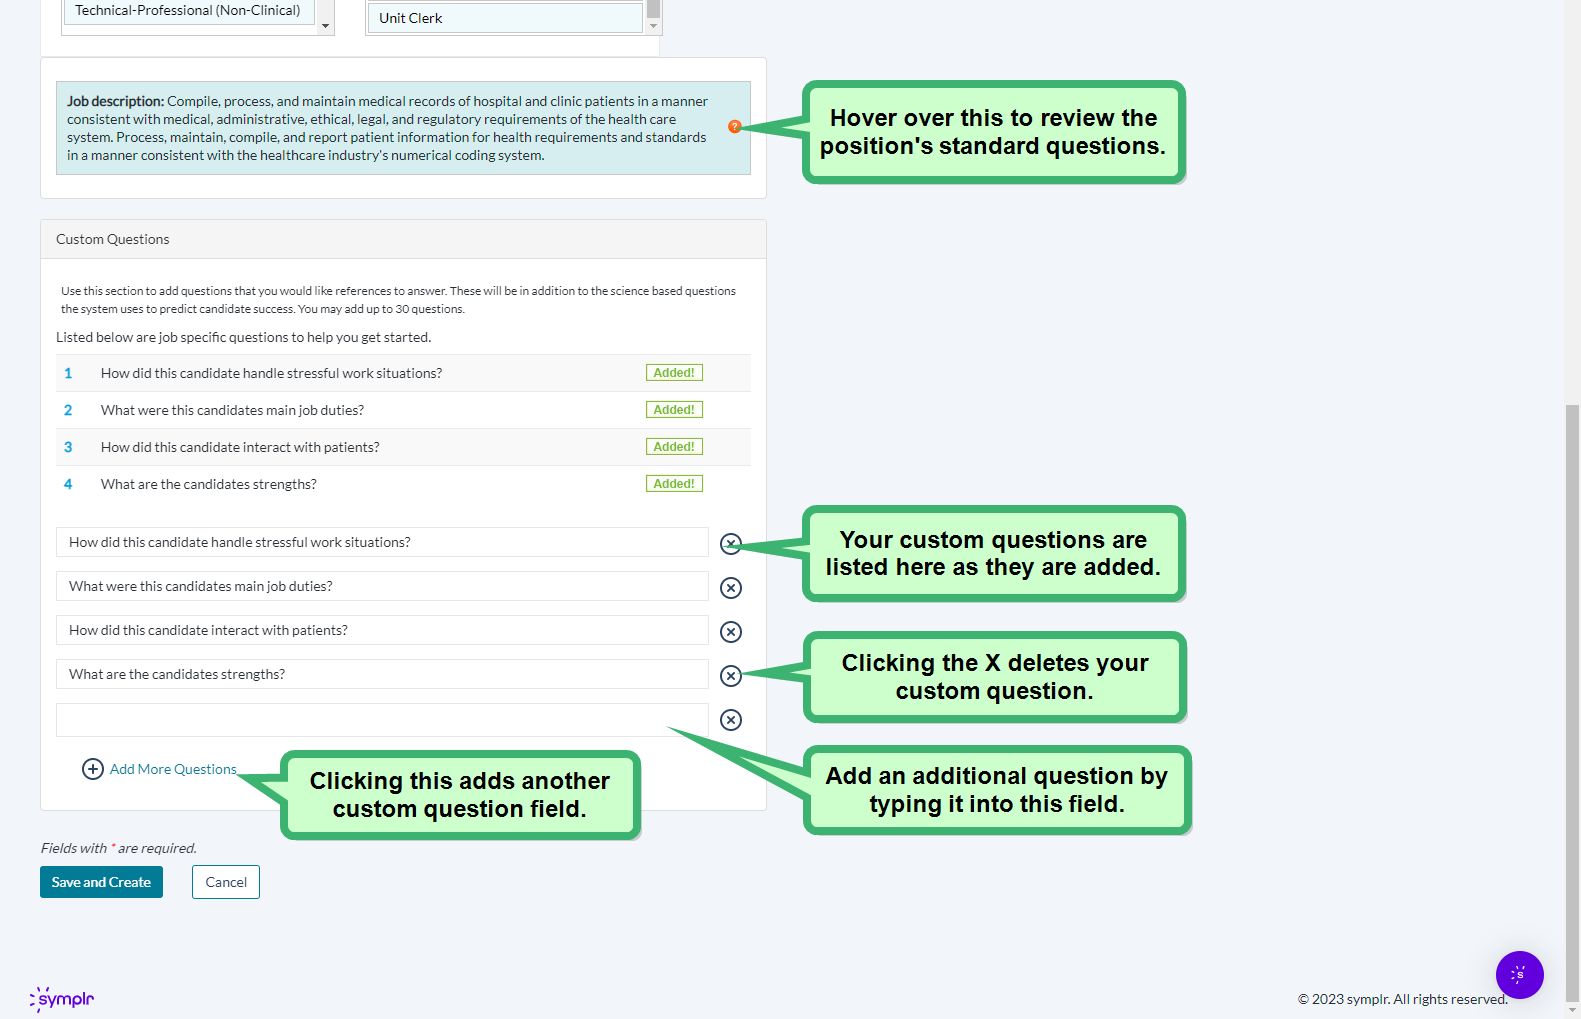
Some introductory questions are provided as soon as the position and location have been selected. Any questions that have been added display towards the bottom of the Custom Questions area, in a series of text fields.
Edit any question by typing into its text field.
Add another question by clicking the Add More Questions icon at the bottom of the Custom Questions area. Clicking this adds a new blank text field for you to type into. When you have reached the maximum number of custom question fields, the Add More Questions option disappears.
To delete a question from the list, click the red X to the right of its text field.
