Start Hiring wizard
The Start Hiring wizard walks you through the process of creating and posting a job opening. Each step of the wizard collects key information necessary to ensure postings inform and engage potential applicants.
The wizard is launched by clicking Start Hiring from the navigation menu.
-
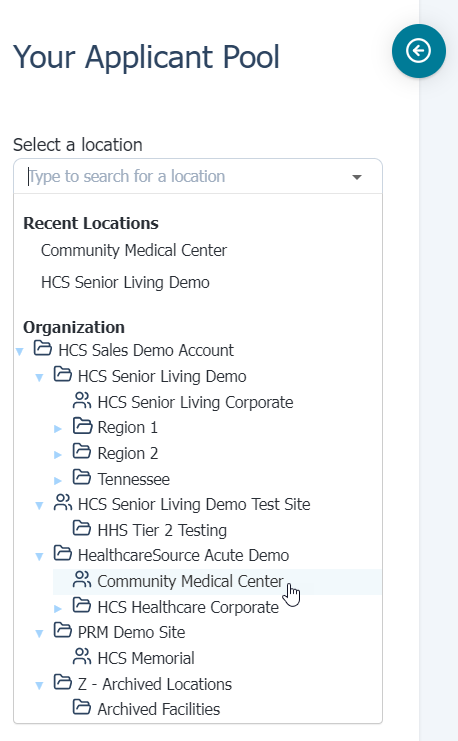
Select a Location. This step sets the specific area of your organizational structure where the opening resides. Your selection here determines which job templates are available in the next step.
 Learn more
You can browse and select a location from the organizational structure, or use the Search area above by typing in part of the name of the desired location.
Upon selecting a location, its address displays directly underneath.
Note: If a location is selected that does not have any associated jobs, the system displays a warning message and you cannot continue with the job posting process until selecting a location with jobs.
-
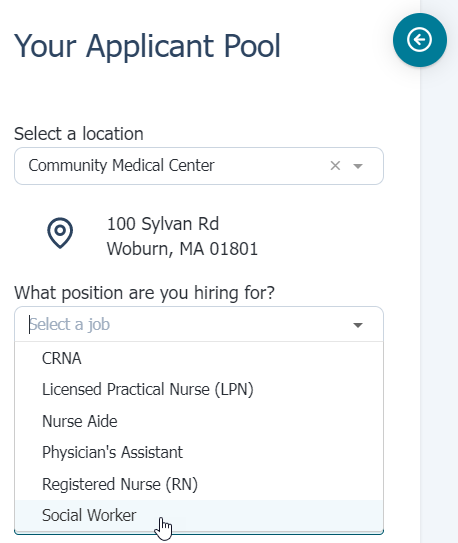
Select a Position. This is where you select the actual job for which you have an opening at the selected location.
 Learn more
You can select a job title from the drop-down menu, or begin typing in a job title to see a list of matching jobs in the list. Selecting a job title does one of two things:
-
If there are no approved requisitions for the selected position, the system displays required fields for the posting.
The Quantity option allows you to create multiple postings when you have additional openings for a selected job. Including multiple postings adds a new posting section to the page in case edits to individual postings are needed.
Note: The fields that display may vary based on the job and/or location selected.
-
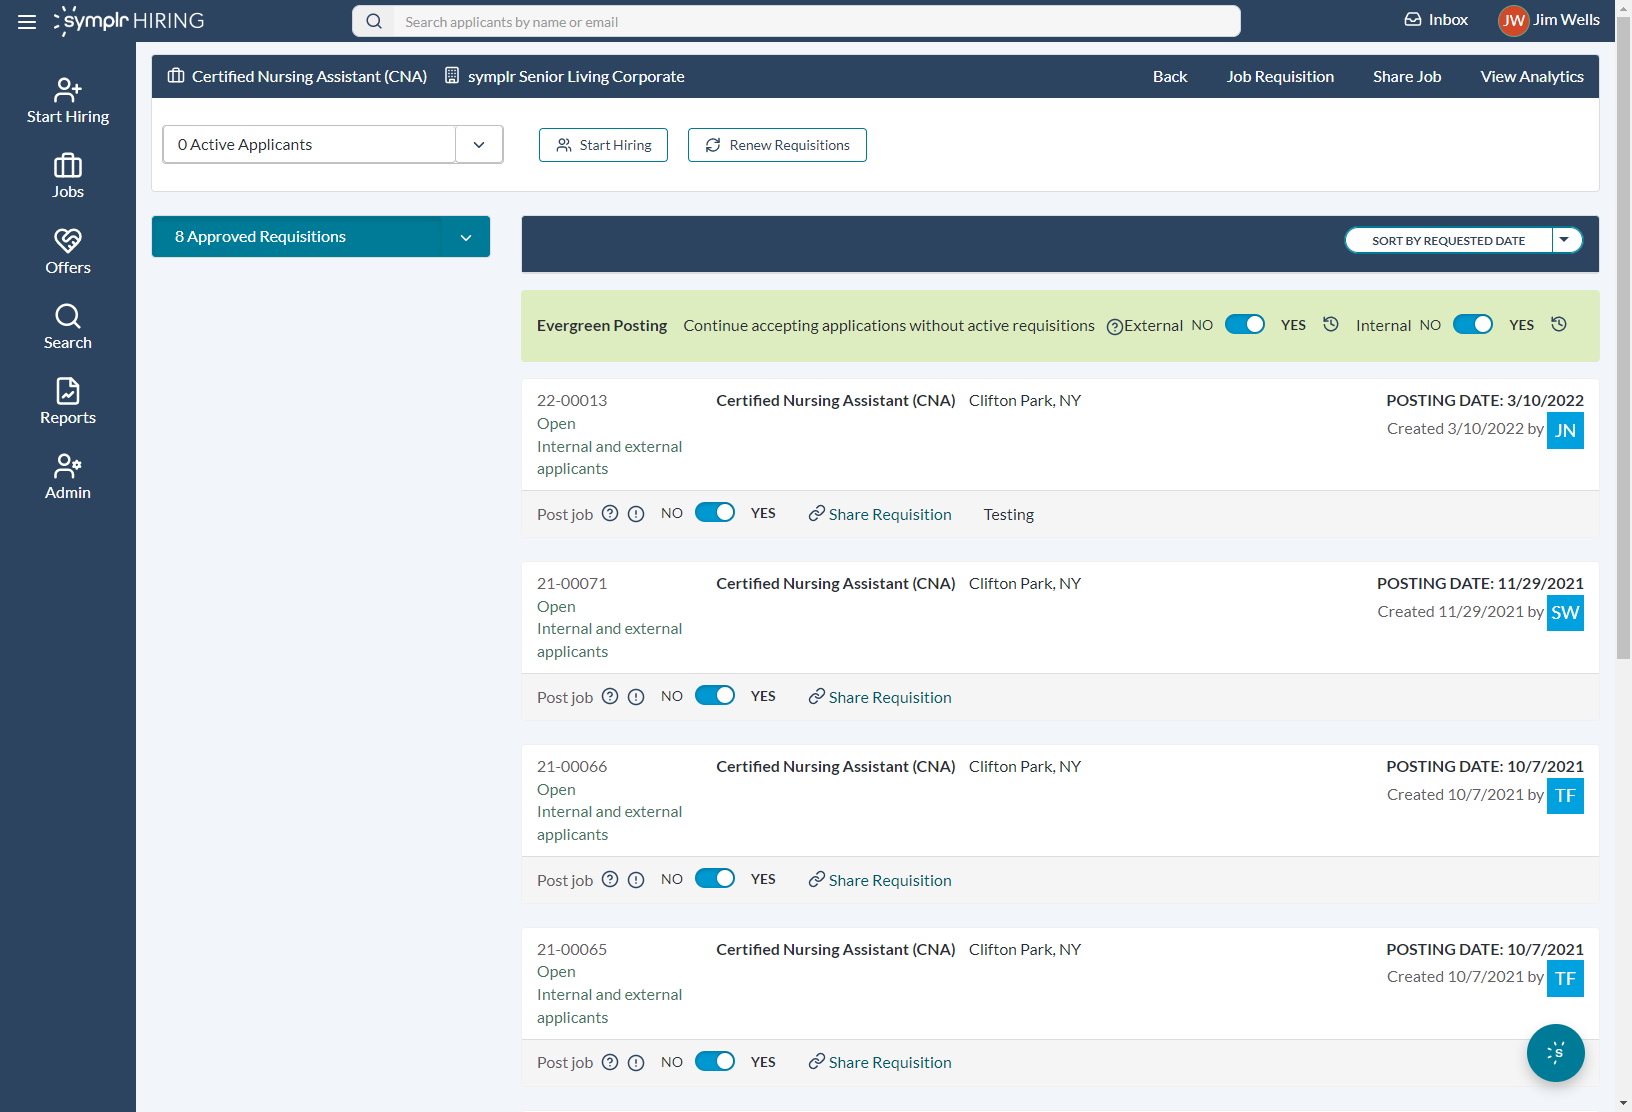
If there are openings already available for the selected job, the system alerts you and gives you two options: to either Renew Requisitions, allowing you to edit previous postings, or to Create a New Requisition, creating brand new postings to join those already existing in the system.

-
-
Creating, Posting, and Renewing. The final step of the wizard allows you to create and/or review your requisition details and make any necessary edits, as well as specify the job boards (channels) for the posting.
 Learn more
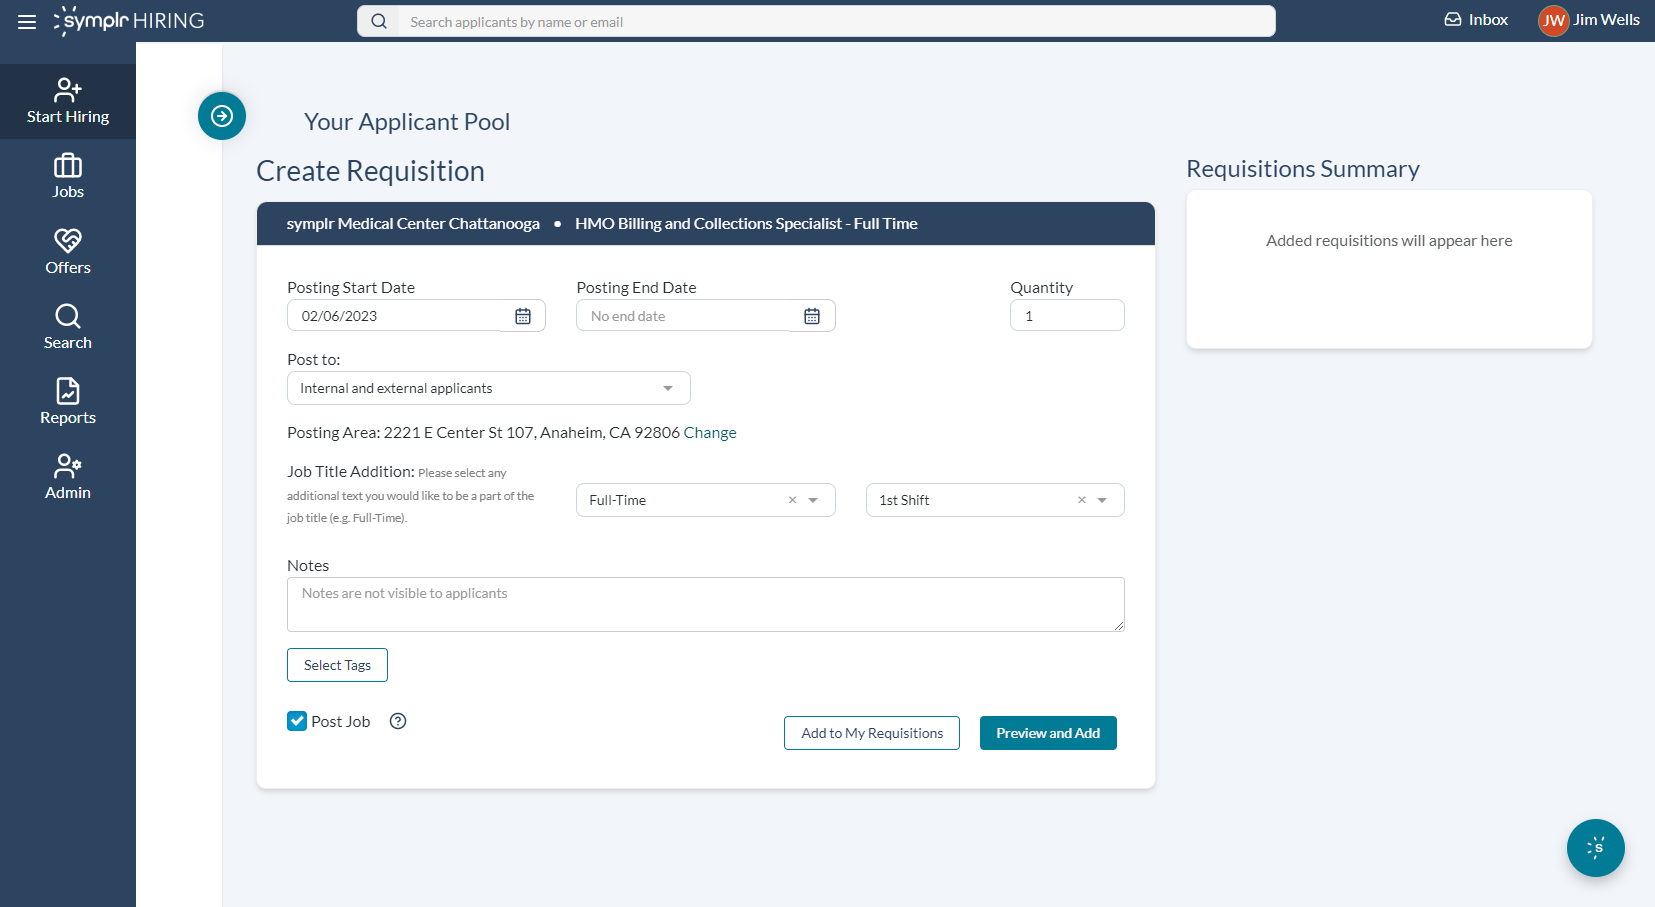
The Create Requisition page lets you customize several data fields relating to the opening you're adding. Enter the necessary details in each field. When you've gotten the details just right, selecting Add to my Requisitions adds it to the list.
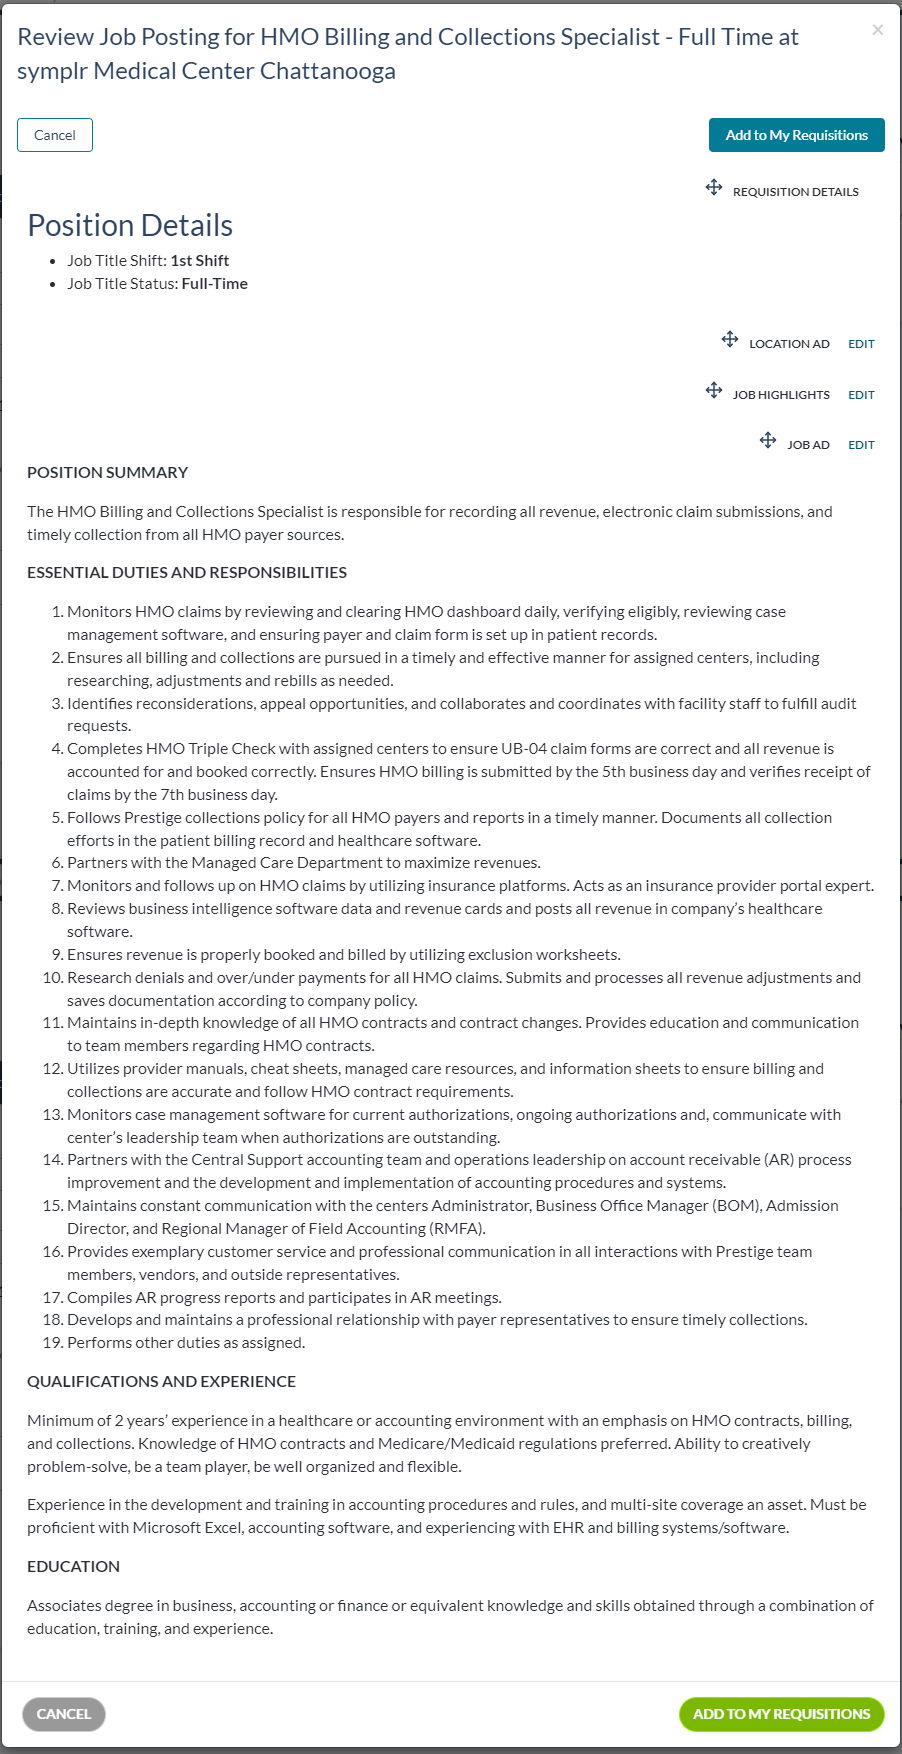
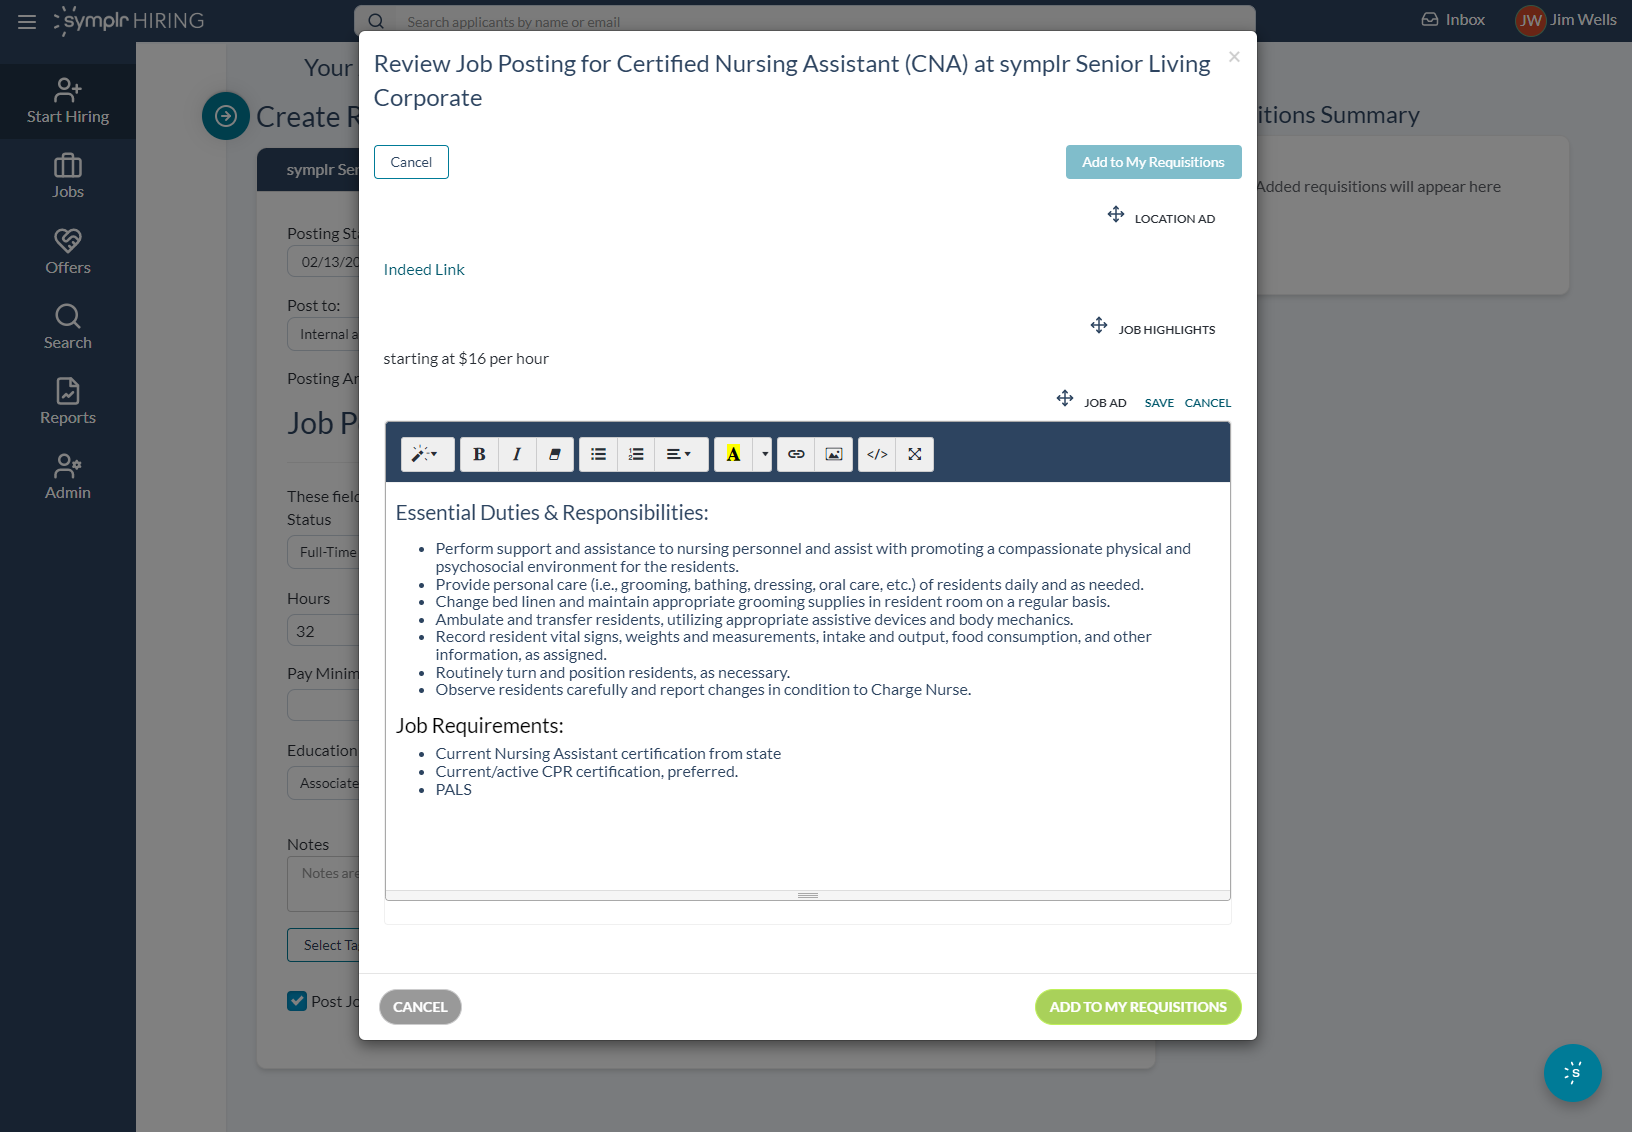
Selecting Preview and Add allows you to review the details of the job(s) and view them as they will appear online before posting to the selected sites.
If you need to adjust a section, selecting Edit activates a rich text field where you can revise the posting. When you've finished editing, selecting Save keeps them, or Cancel discards your changes.
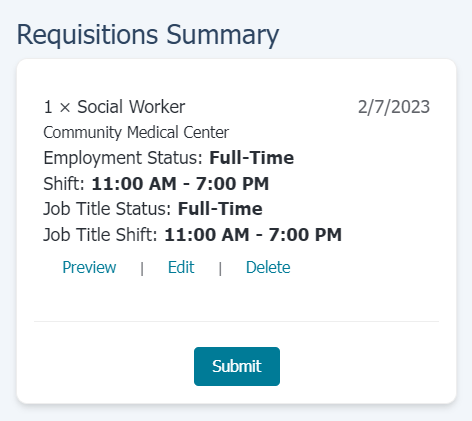
Selecting Add to My Requisitions puts the posting into the Requisitions Summary section on the side of the page. Requisitions here also have Preview, Edit, and Delete options.
You can also see which users are assigned as approvers to any requisition by selecting the View approval chain link at the top of the pane. This lists each user that must provide approval for a requisition before it can be posted as a job opening.
After adding all the necessary requisitions, selecting Submit sends them off. From here, you may further promote your requisitions by publishing them to other job boards, begin a new requisition, or simply close the popup and carry on with the rest of your day.
 Renewing Existing Requisitions
Selecting Renew Requisitions displays the Requisition List page for the chosen job.
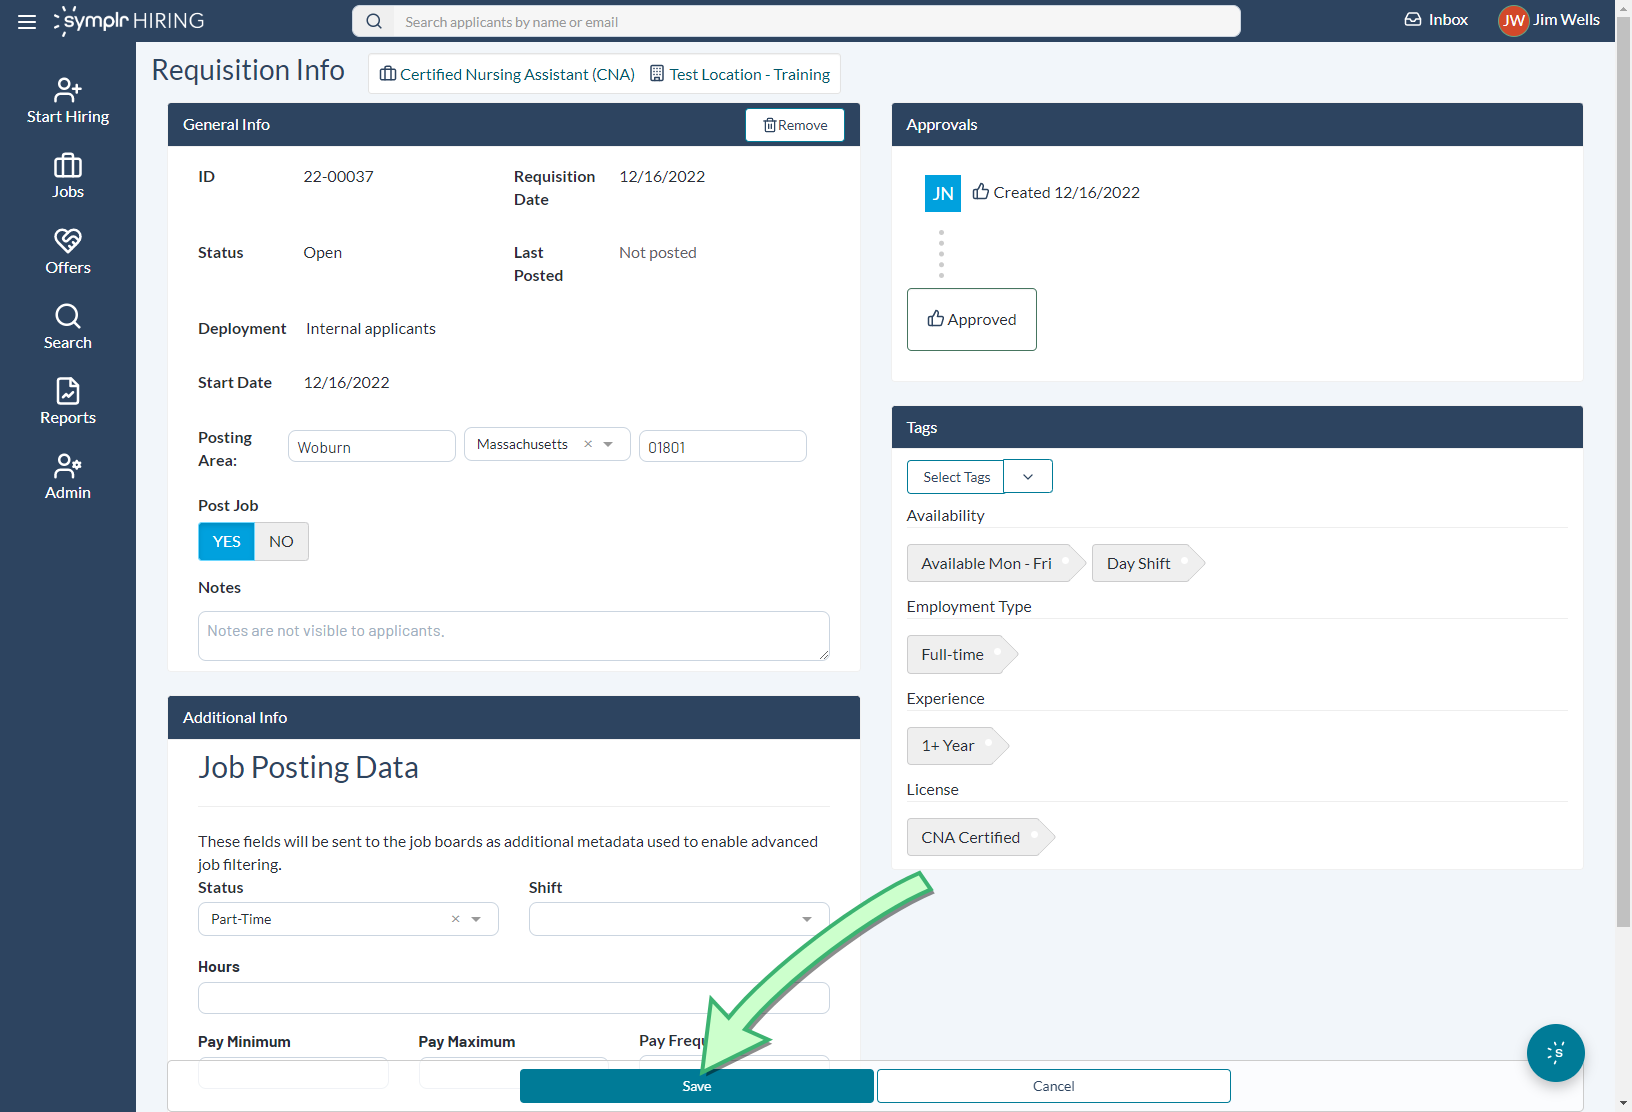
Selecting a requisition displays its Requisition Info page, where you can make any edits you need to the job details. After you've made your changes, selecting Save at the bottom of the page retains your changes and updates the posted requisition.
Loading feedback link...
