Editing Invitation Text
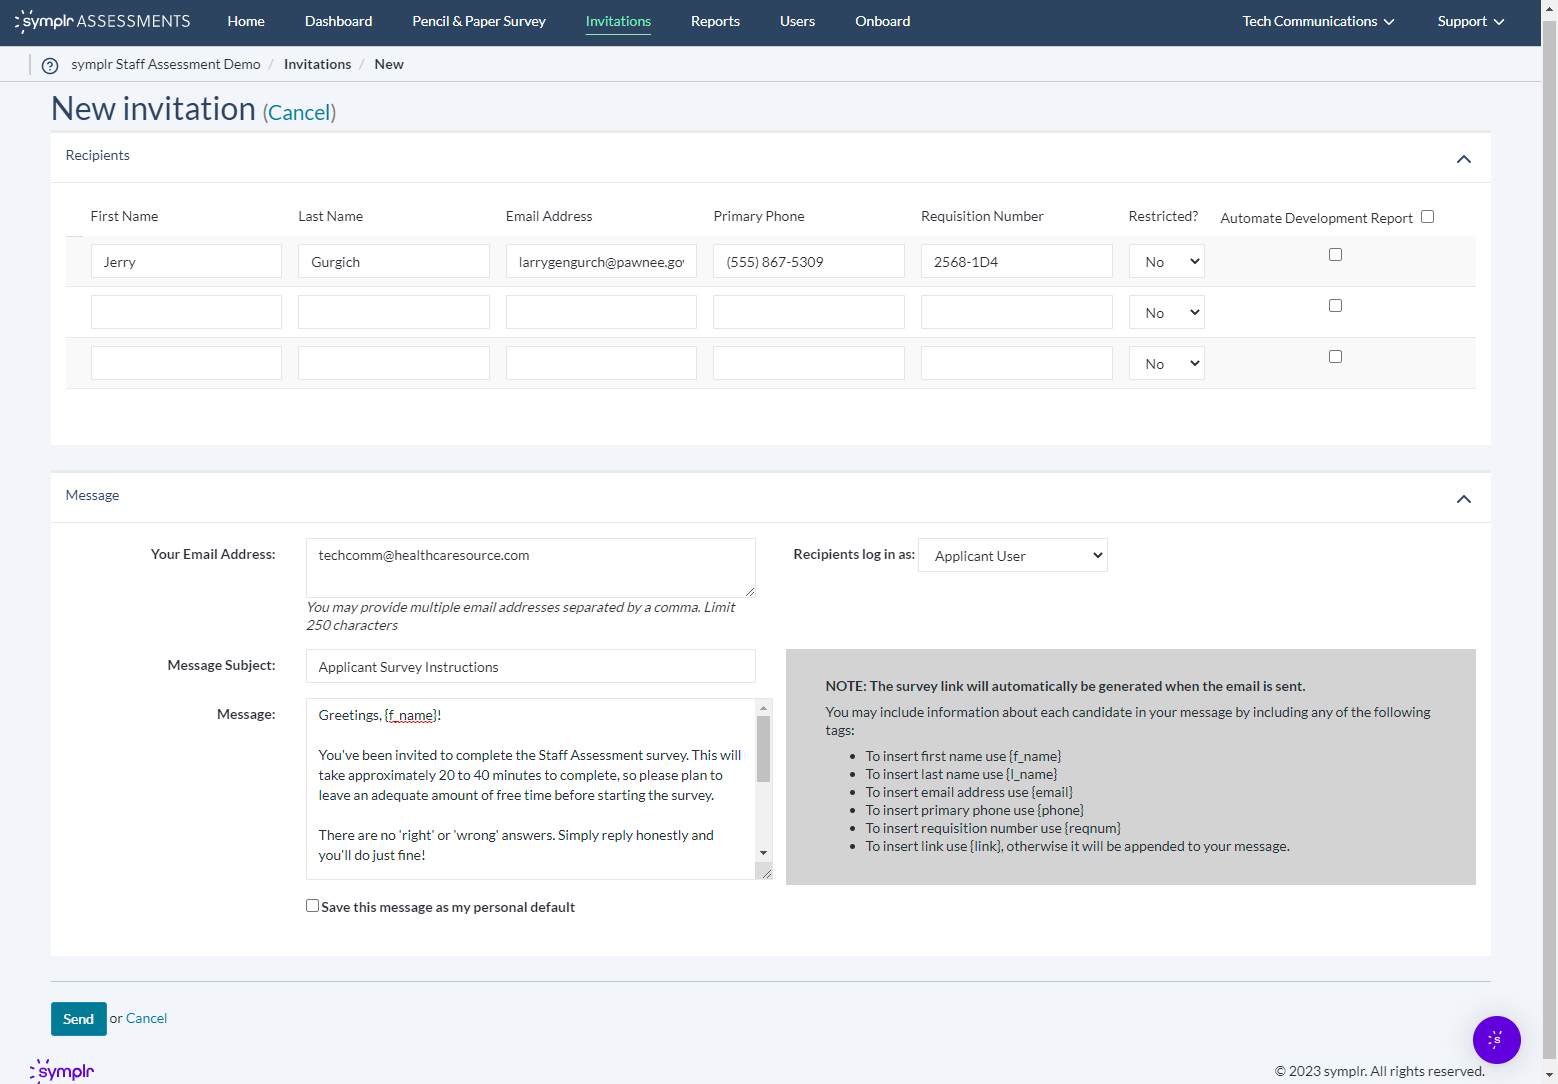
When sending an invitation to a candidate, you can adjust its subject and content as needed from the New Invitation page. Clicking the Invite People button in the upper-left area of the Invitations page opens this page where the recipients, subject line and body of the invitation may be tailored to your satisfaction.
After adding recipients, add a return email address to the Your Email Address field. Entering a return email address provides a way for the candidate to reply if needed, and you will also receive an automated notification as soon as the candidate completes their online assessment.
The Message Subject field can be revised to change the subject line of the invitation email. If further adjustments are needed, you may also change the contents of the Message box, which controls the exact message delivered to the recipients.
Next to the Message box, the Instructions section displays some tags to utilize. You may insert the candidate’s first name, last name, or email address if you wish to add dash of personalization to these invitations. There are also tags to add the phone number, requisition number, and the link to the survey. Simply by typing the appropriate tags (including the brackets), every invitation is delivered with the appropriate recipient’s information in the message.
Note: The last tag, {link}, must be included in the body of the message to direct these candidates to their assessments. If there is no {link}, the candidate can’t get to their assessment, and you’ll never see any results!
If you like the way this message has taken shape and want it to be the invitation that appears every time you need to send one, click the Save this Message as my Personal Default checkbox. This change is applied after sending.
