Editing Default Invitation Text
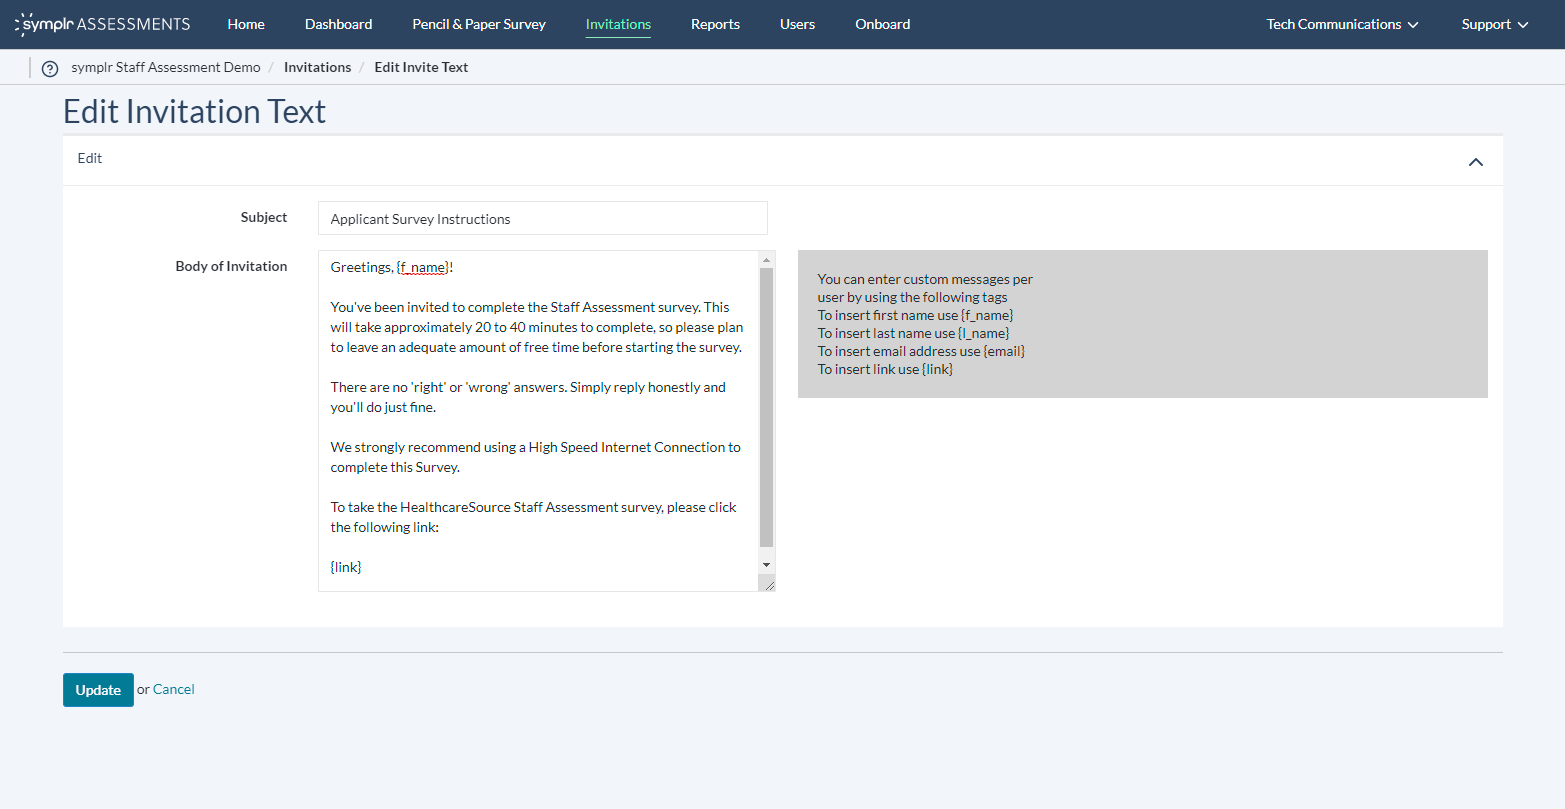
If your default invitations need to be adjusted for all users, click the Edit Default Invitation Text button, found just to the right of the Invite People button in the upper-left area of the Invitations page. This opens the Edit Invitation Text page, where the subject line and body of the invitation may be adjusted to your satisfaction.
The Edit area contains the Subject and Body of Invitation fields. Subject controls the subject line of the invitation email. Body of Invitation controls the exact message delivered to the recipients, and may be edited as needed.
Next to the Invitation Text area is a display of available tags that let you add dashes of personalization to outbound invitations. These tags enable you to automatically insert the candidate’s first name, last name, or email address. Simply by typing the desired tags (including the brackets) into the invitation body text (and saving), invitations are delivered containing a message uniquely customized to its recipient, every time.
Note: The final tag, {link}, must be included somewhere in the body of the message to direct the candidate to their Assessment. If there is no {link}, the candidate can’t get to their assessment, and you’ll never see any results!
When your invitation text looks perfect and you don’t think it could possibly get any better, click Update to save your changes. If, on the other hand, you accidentally made a bit of a mess, click Cancel to discard your changes and leave it the way it was.
