Feedback
There are a few different methods of logging feedback, issuing recognition, and keeping track of personal events within symplr Performance, and they can all be viewed from the three tabbed sections on this page. The Feedbackpage allows users to review Feedback that has been given to the employee by their manager, as well as review any Recognition and Remarks sent by colleagues. Additionally, if users wish to make a written record of something that occurred, the Journal tab allows them to add or review entries in their Employee Journal.
On this page, the area found under the Feedback tab allows the administrator to view and manage feedback for the selected employee. Whether it's positive reinforcement, coaching to foster improvement, or issuing corrective feedback, such occurrences may be issued and reviewed from here.
Any existing feedback can be viewed by clicking the link in the available tables. Alternately, it can also be printed or deleted via the options found in the Actions drop-down menu in the right-most column of the feedback table.
New feedback (and notes) can be created as well by using the Add Note and Add Feedback buttons. For additional details about these options, please refer to the Notes and Adding Feedback pages.
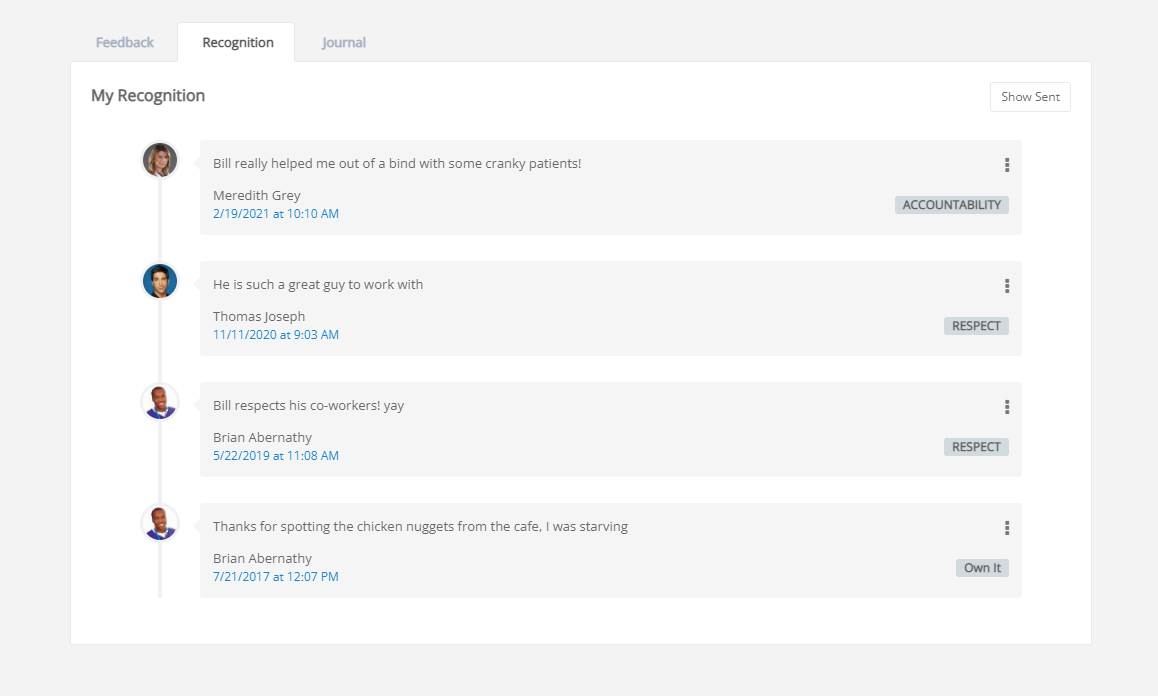
The Recognition tab on this page shows a list of feedback received via the Recognition and Remarks form, presented in chronological order.
Clicking Show Sent in the upper-right corner of the tab displays a list of all recognition sent to other employees. When clicked, this button changes to Show Received. Clicking this button again reverts the page back to its original display.
Additional options to Print or Delete items from the recognition timeline are found by clicking the Actions menu, which is shown as three vertically-aligned dots on the right-hand side of an entry.
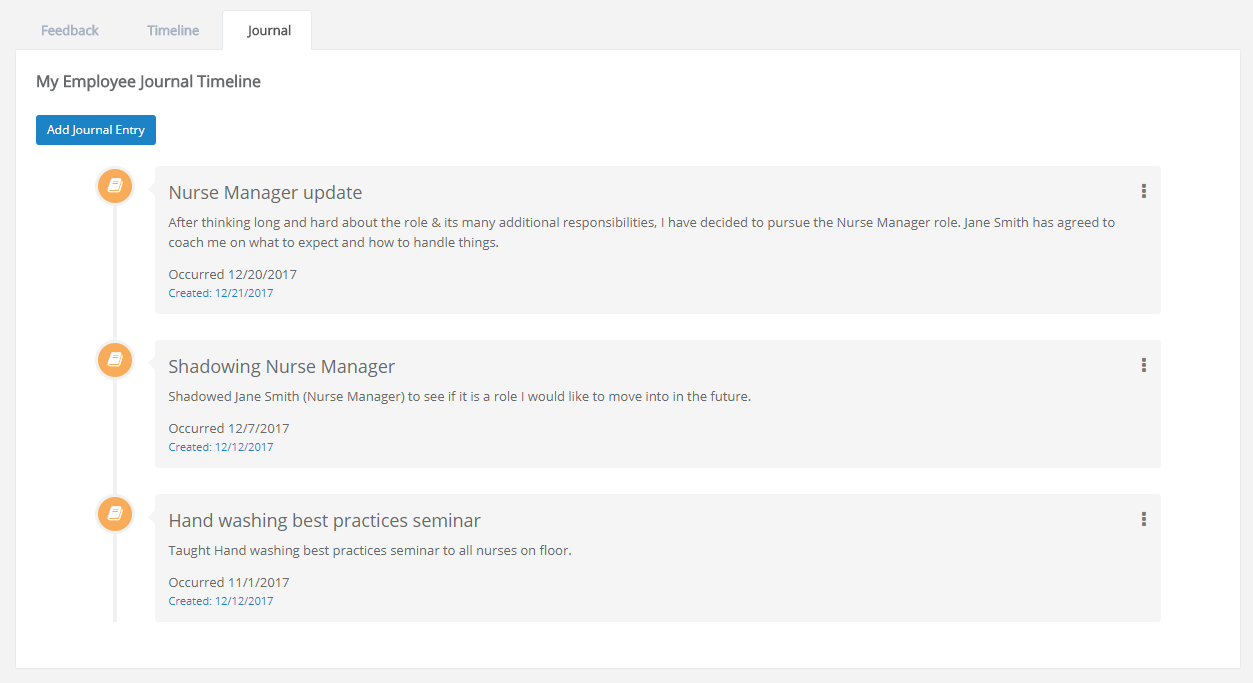
The Journal tab displays your own record of events and accomplishments that were entered using the Journal form. Entries in this page are presented in chronological order, based on the date the entry was created. Creating a new entry is conducted via the Add Journal Entry button, which displays the same form that appears after clicking the Journal icon. The Actions menu presents options to Edit an entry or Delete it from your timeline.


